Users
Overview of the User administration page. Here it’s possible to create, edit, and delete users. You can also reset their password from this page.
Note
When Active Directory integration is enabled, the users and managers are administrated through the Active Directory.
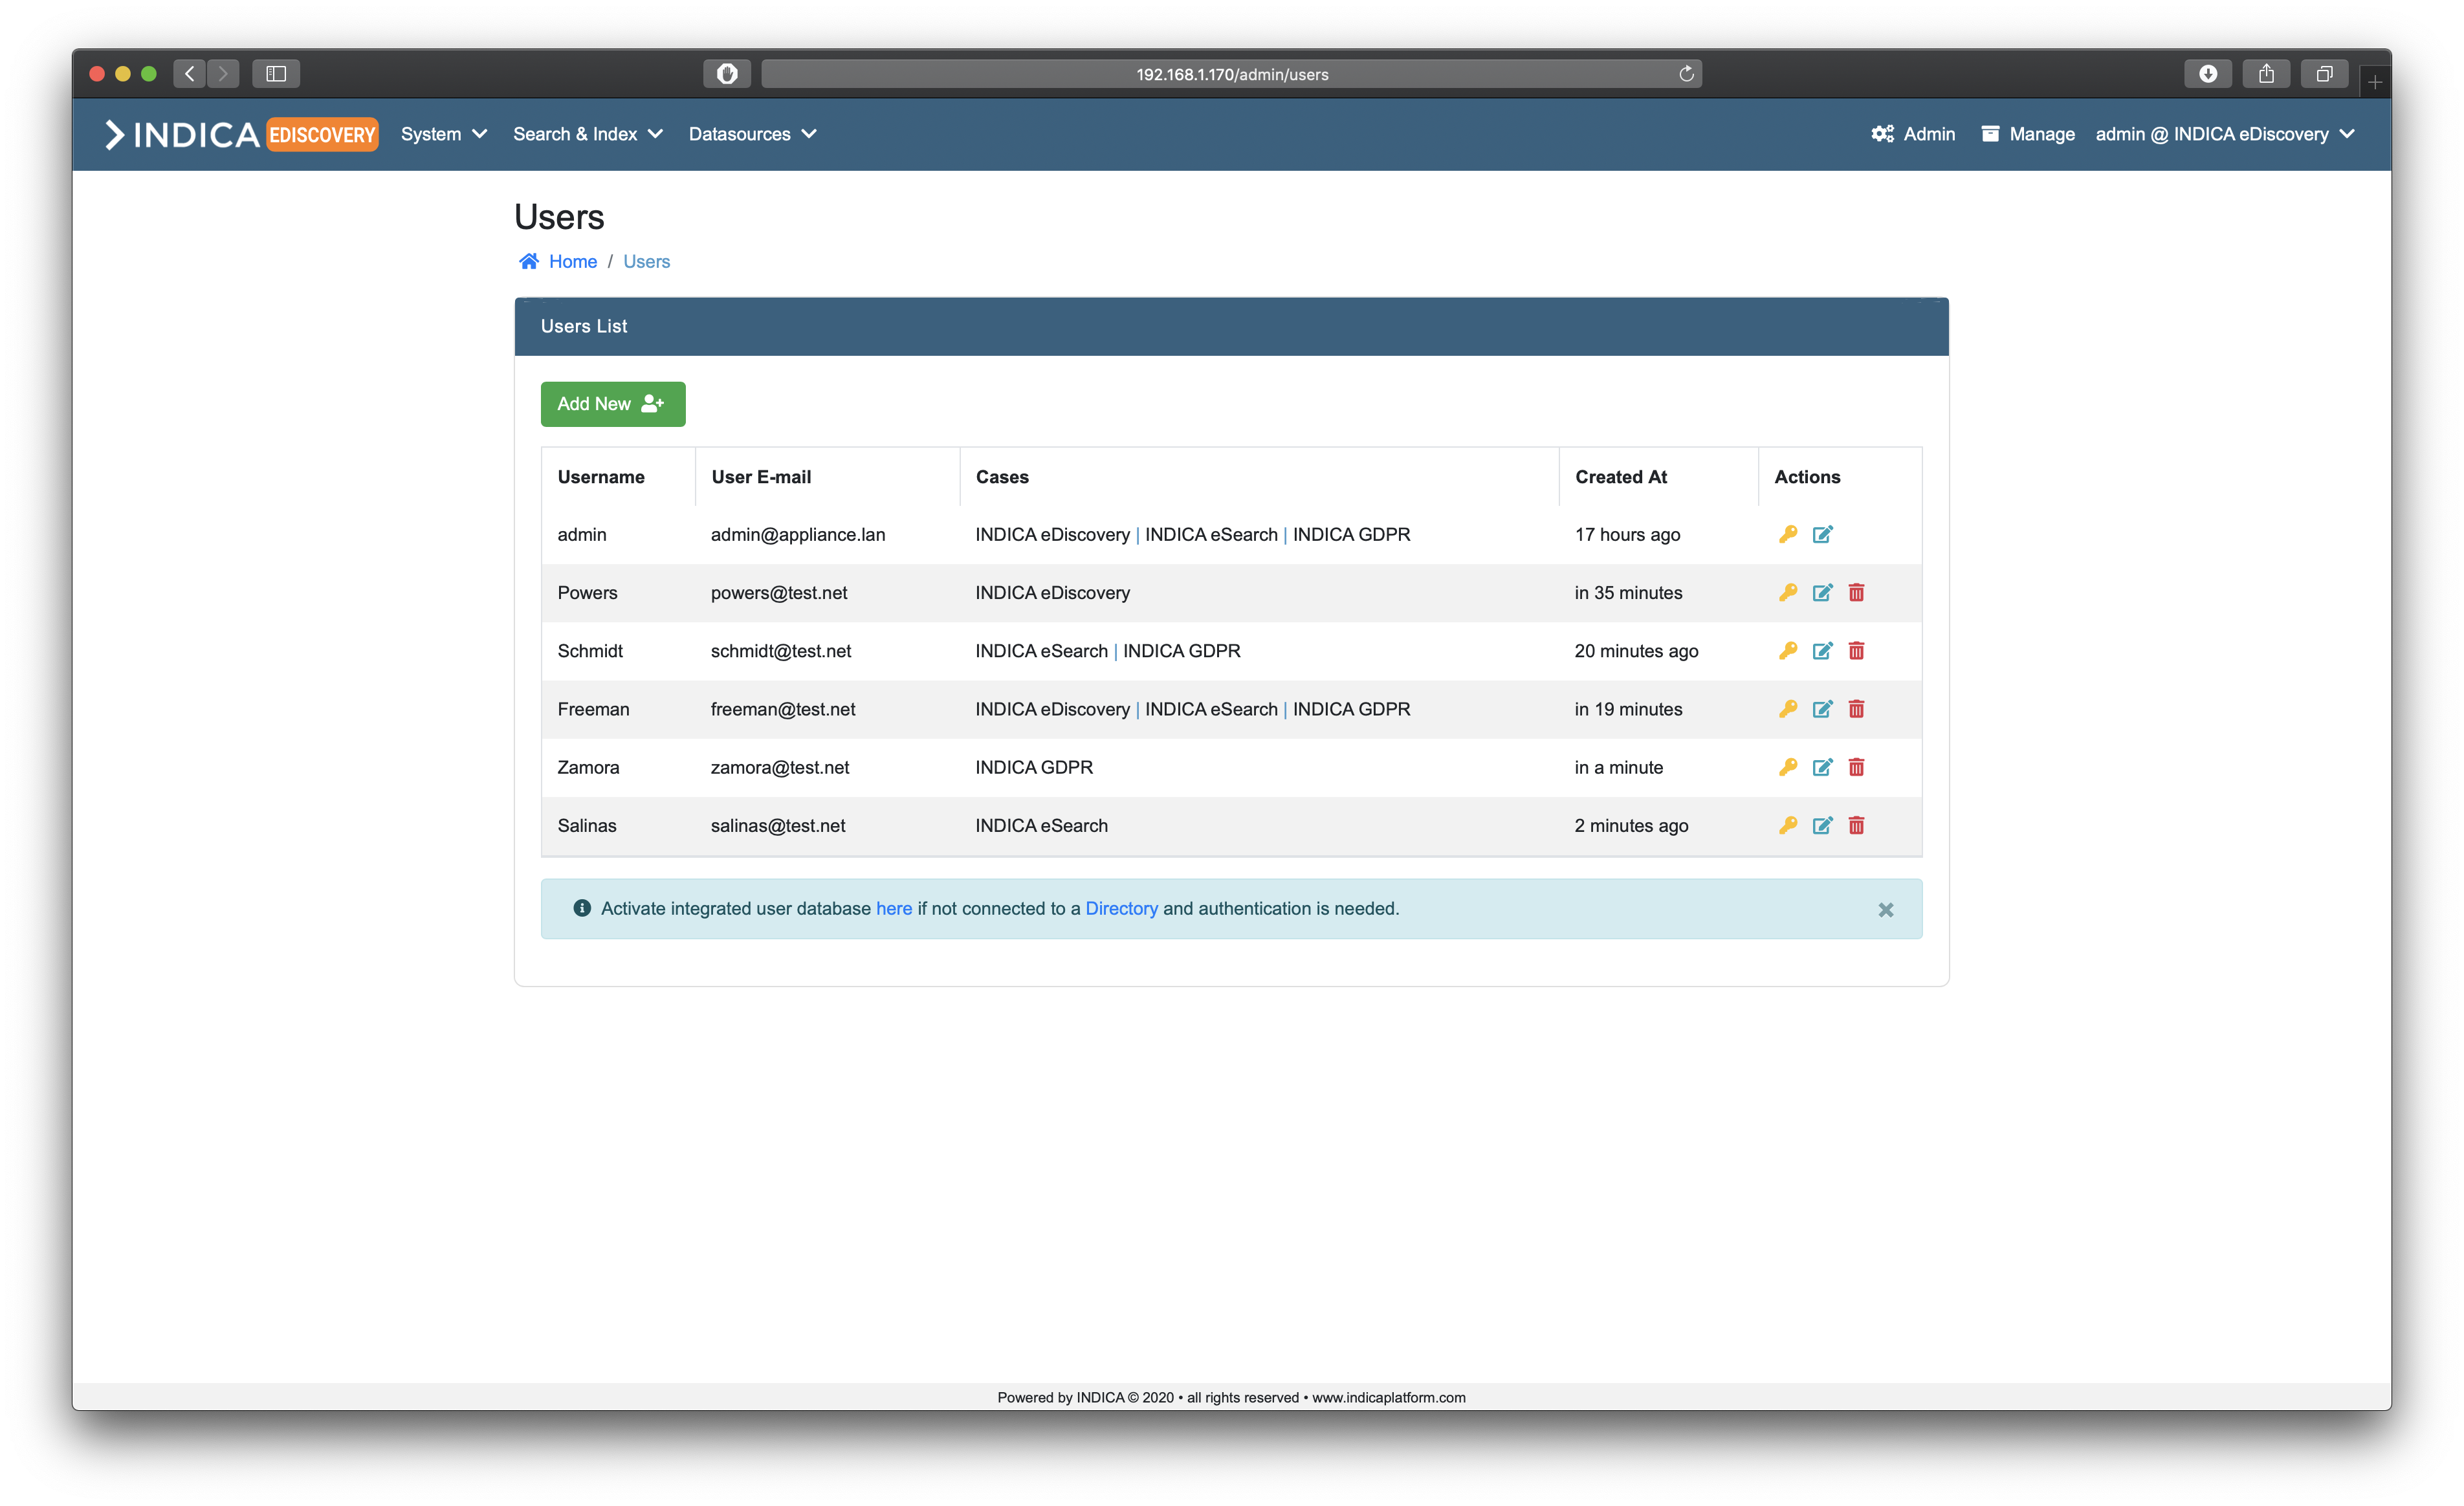
Users List
The listview provides administrators with some useful information and features. In the table the following columns are present:
- Username
Username of the user.
- User E-mail
E-mail address of the user.
- Cases
List of cases that the user has access to, separated by the (“|”) symbol.
- Created At
Creation timestamp of the user.
- Actions
Yellow key button: Reset a user’s password.
Blue paper button: Edit a user.
Red trashbin button: Delete a user.
Creating a user
Creating a user is done by clicking the green “Add New” button. A popup will open:
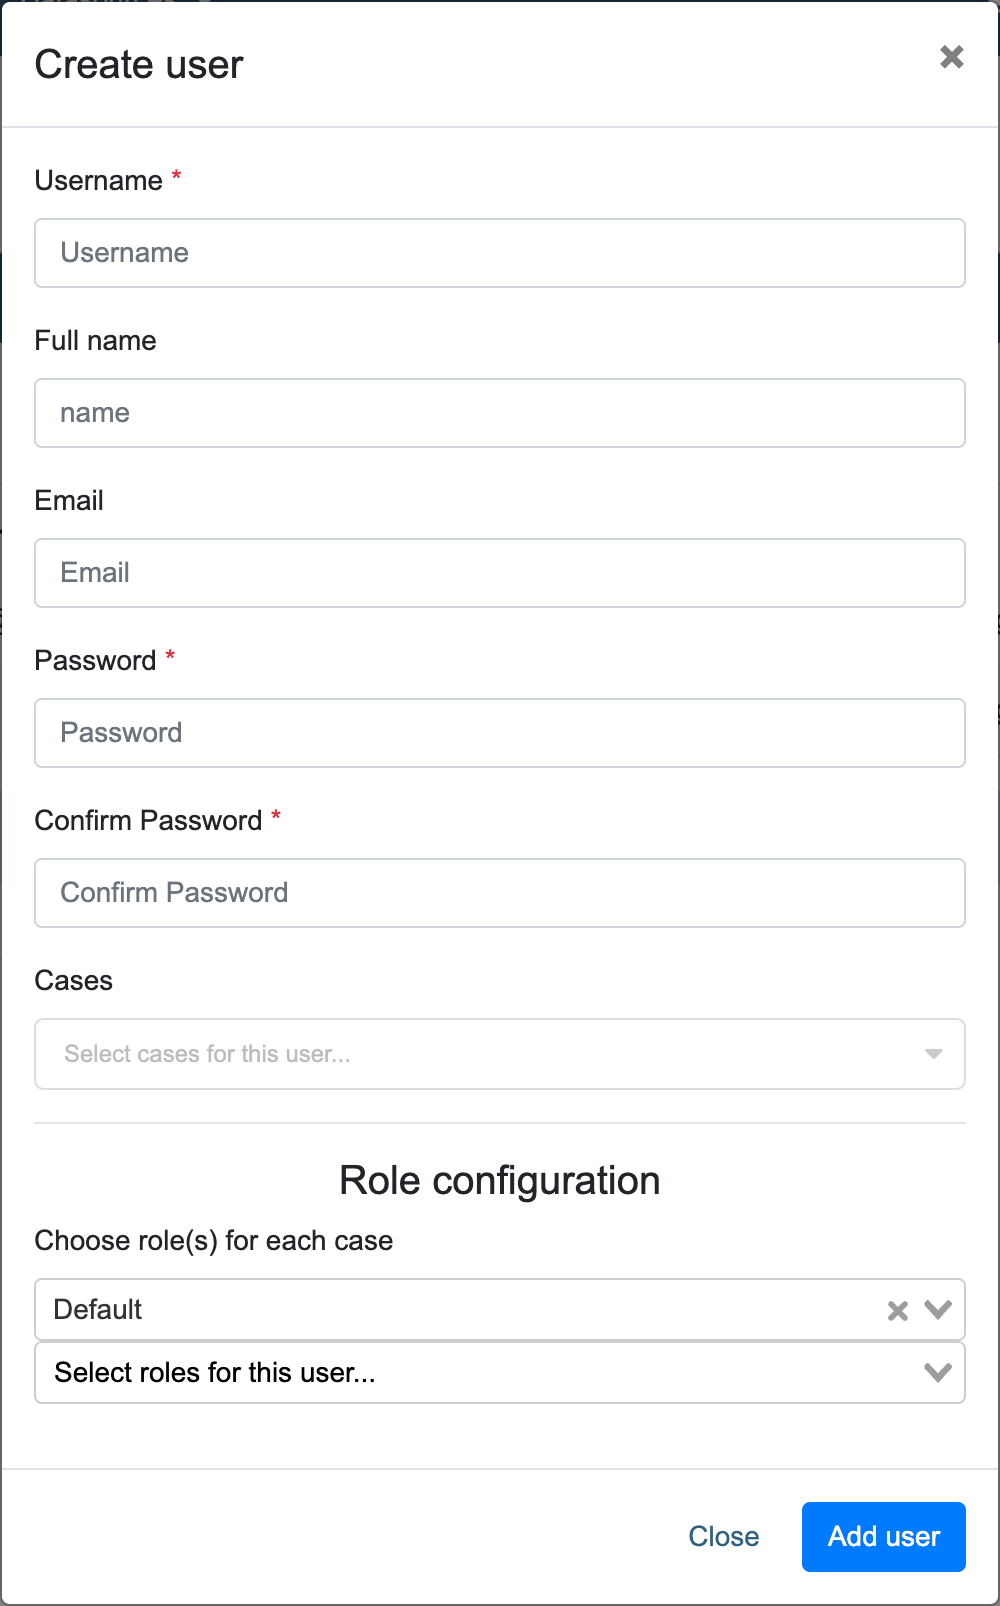
Simply fill in the following details, and click “Add User” when done.
- Username
- Username for the new user. The username must be unique.This username is used to sign in into INDICA.
- Full Name
- Full name of the user. If given, this name will be displayed instead of the username.
- E-mail address of the user.
- Password (2x)
- Choose a password for the user.Use a strong password to prevent unauthorised access.
- Case(s)
- Choose the case(s) that the user should have access to.
- Role configuration (only available when AD integration is not activated)
- Choose role(s) for the new user.Available roles are dependent on the setup of Roles and Permissions.In the top drop-down, cases can be selected. Once a case is selected, roles can be selected in the bottom dropdown for each case.
Note
Creating users is not needed when AD integration is enabled and configured. INDICA will import the user’s information from the AD upon signing in.
Editing a user
Editing a user is done by clicking the blue paper button in the “Actions” column of the “Users List”. A popup will open:
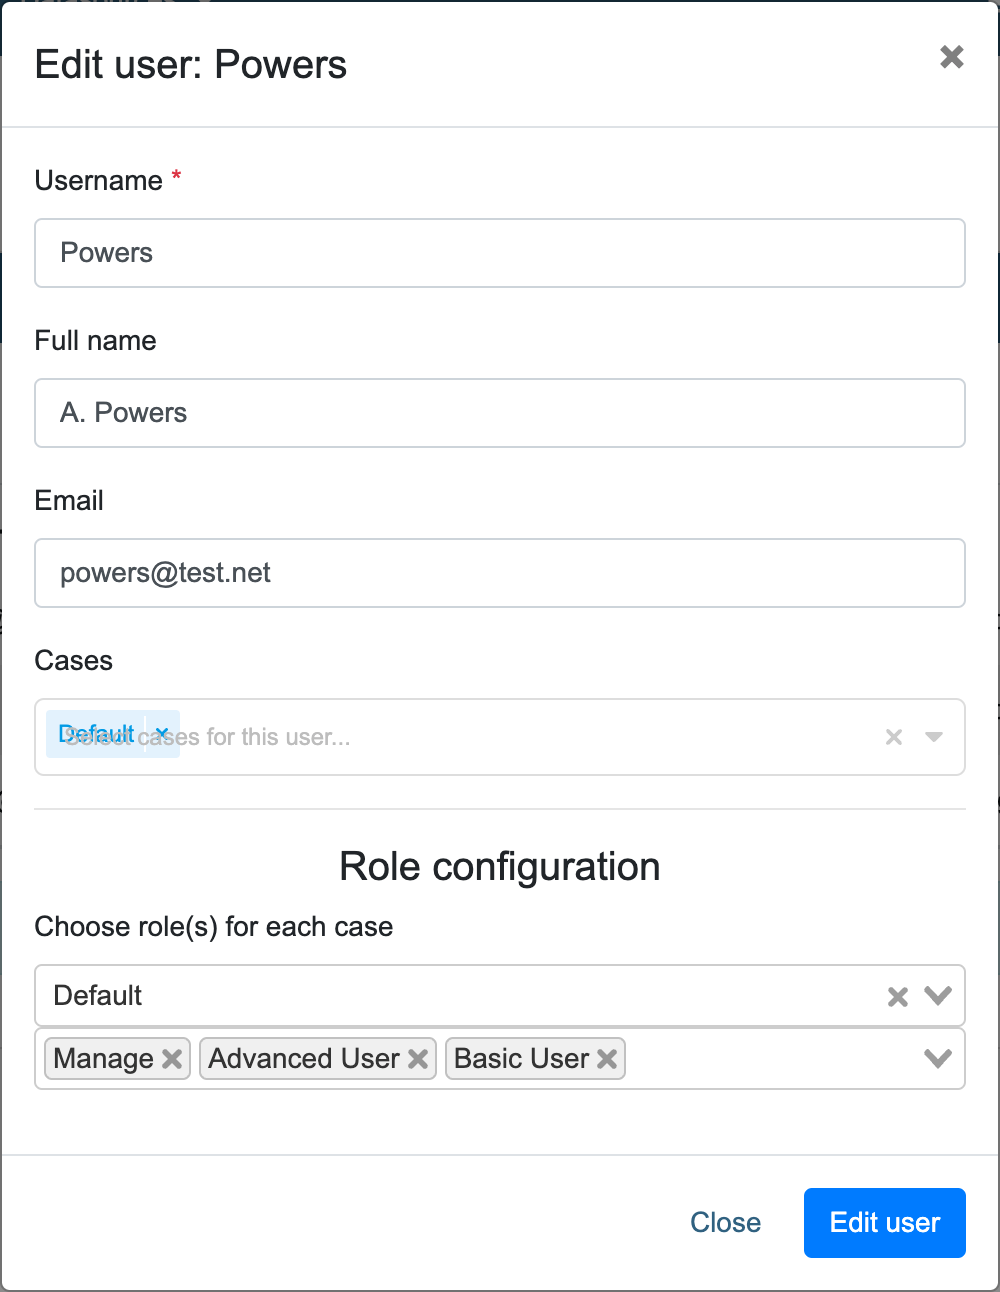
Here you can edit the settings of the user. When done, click “Edit user” to save the changes.
Deleting a user
Deleting a user is done by clicking the red trashbin button in the “Actions” column of the “Users List”.
A confirmation popup will open. Click “Delete” to permanently delete the user. This action cannot be undone.
Note
Deleting a user that signed in using AD integration does not prohibit that user from signing in again. The user needs to be removed from the AD groups on the AD side.
Resetting a user’s password
Resetting a user’s password only works when there is no AD integration active.
Resetting a user’s password is done by clicking the yellow key button in the “Actions” column of the “Users List”. A popup will open:
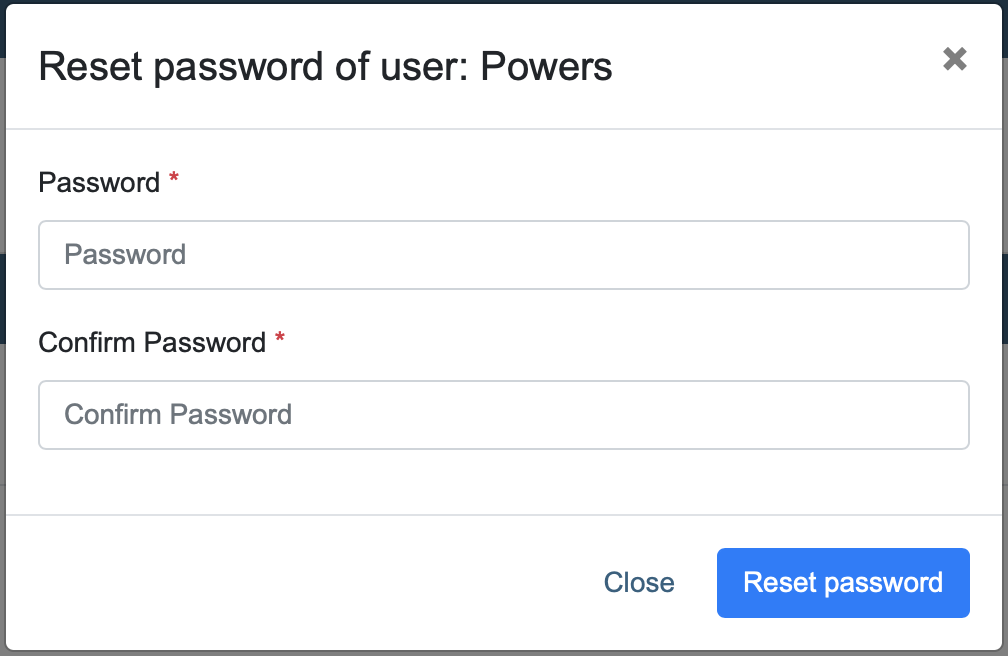
Simply pick a new password, confirm it, and click “Reset Password”. The user can now authenticate using the new password.
Note
The user will not be notified by INDICA that their password has changed.
Resetting the admin password
When the password of the only Admin account has been lost, there is a way to reset the password.
To do this, SSH access and root-level permissions on the appliance are needed. When logged in into the appliance, navigate to the following directory:
cd /net/www
Then, run the following command:
php artisan user:resetpw
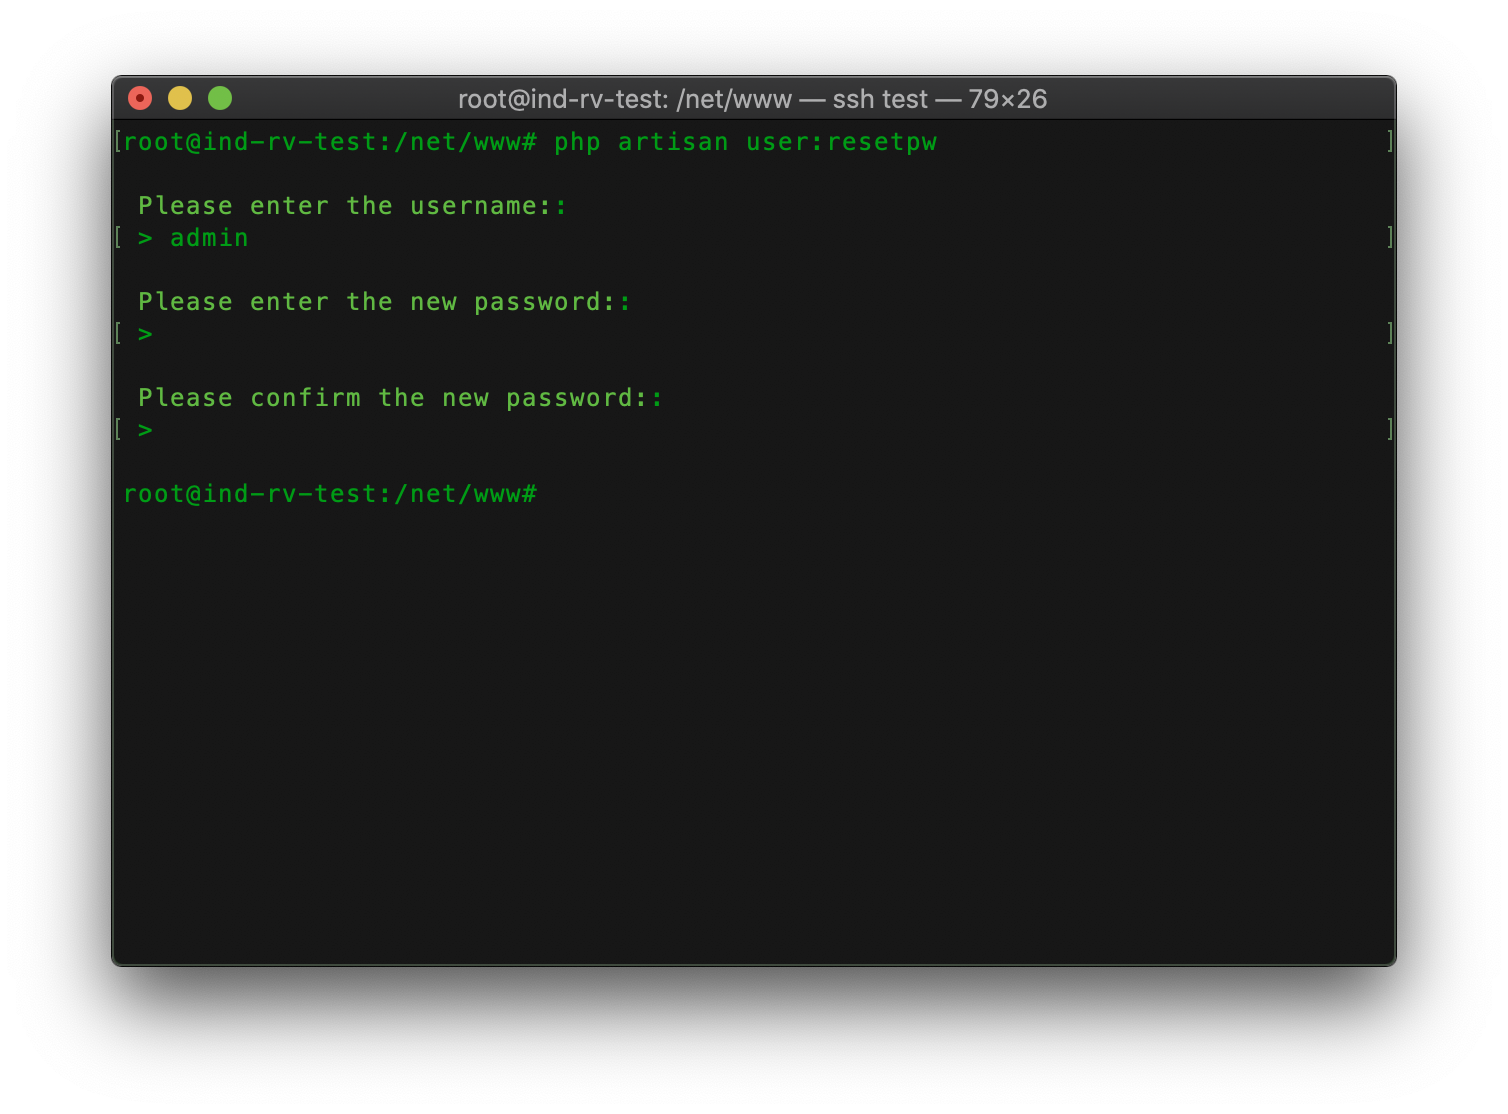
The command will ask for the username and then for a new password.
Note
When typing the new password, nothing will be displayed.
You should now be able to authenticate in the front-end with the new password.