Case Manager Workflow
Table of Contents
The workflow can be found within the manage interface underneath the Process menu item. Here you can see an overview of existing workflows and create, edit or delete workflows.
Create workflow
To create a workflow click the Create new workflow button. This will bring you to a new page where you can do the following actions:
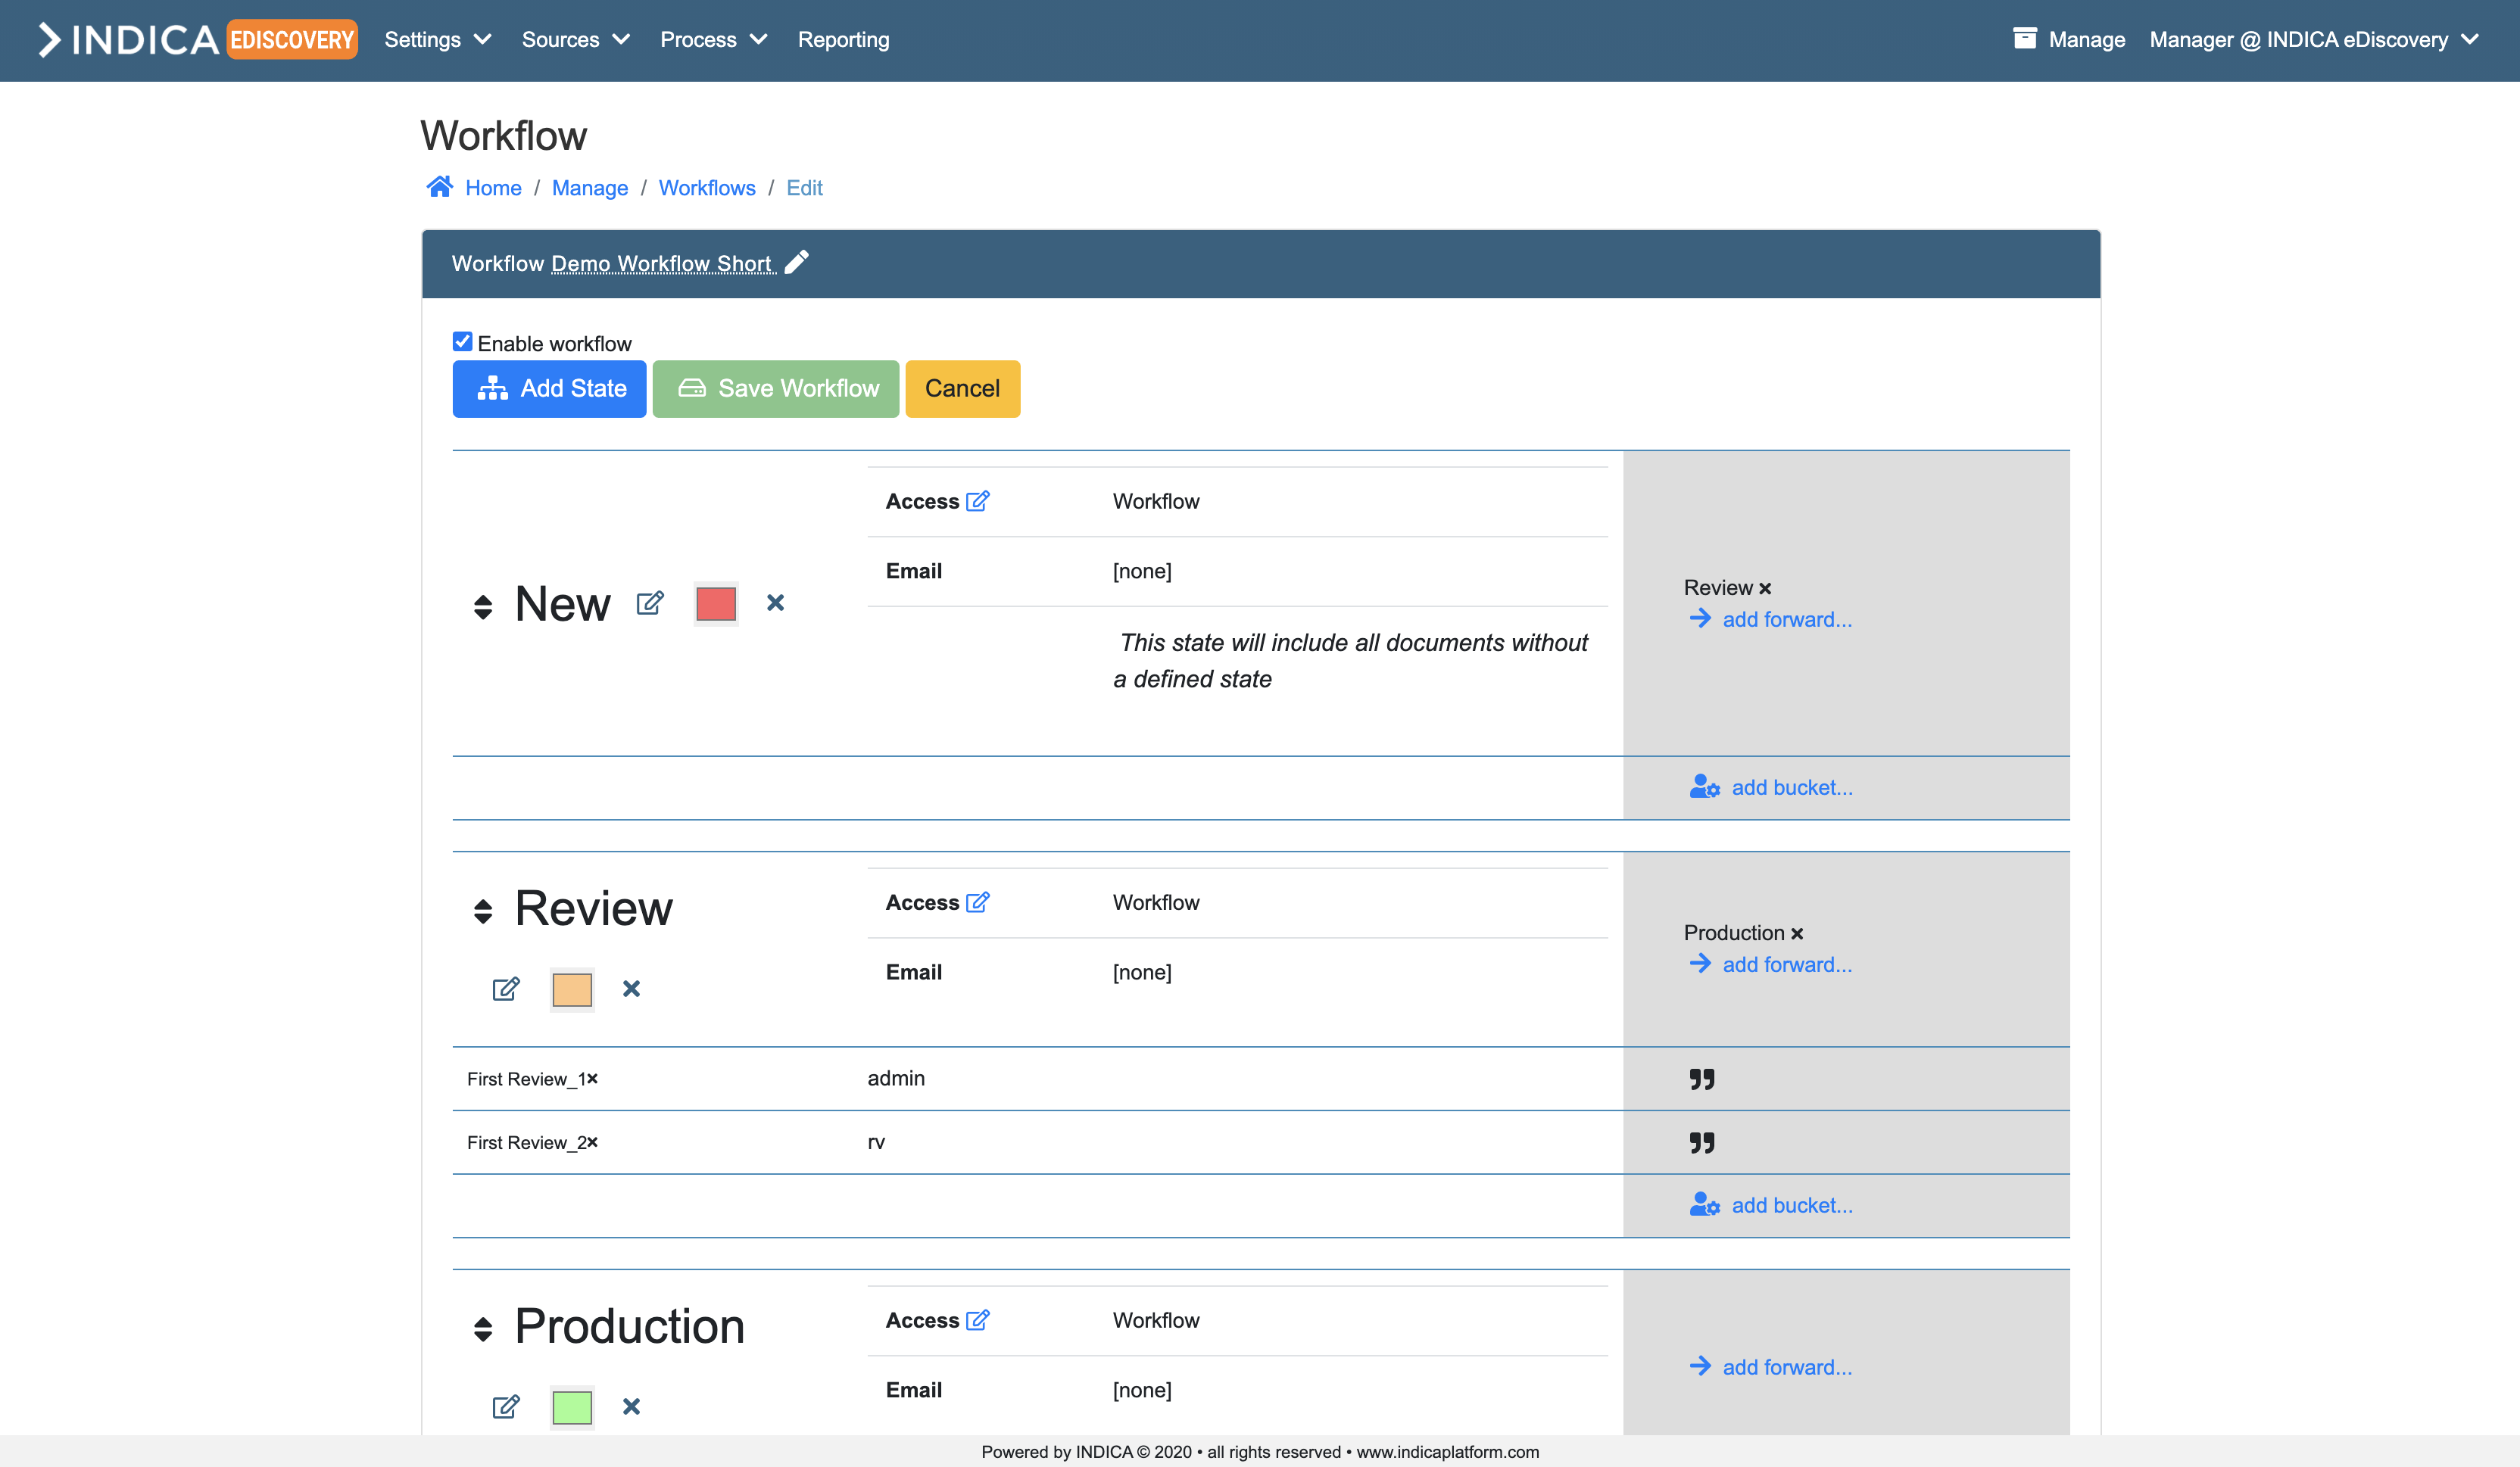
Edit Workflow Name
To edit the workflow name, click the pen icon next to the workflow name. Edit the name and press enter to finalize the changes. Please do not forget to click the Save Workflow button to save your changes.
Enable Workflow
To enable the workflow, check the box next to ‘Enable workflow’. If this box is unchecked, the workflow will not show up to users. Please do not forget to click the Save Workflow button to save your changes.
Save Workflow
Make sure you save your changes by clicking the Save Workflow button, otherwise your changes will not be saved.
Cancel
Cancel all changes you made.
Add State
To add a workflow state, click the Add State button. Fill in a name for the state and an email address if necessary and click on the Save button next to the input fields. This will add a new state to your workflow. See all options within the chapter ‘State options’ below.
The first state in a workflow will always be the state where all documents without a defined state will be included.

State options
After a new state is added there are a few possibilities you can do with the new state.
Assign colors
Assigning colors to your states will make the overview a little easier to read. These colors are also used in the icons next to the state within the front-end.
Access
Select a group that has access to the state. Without a group selected the state will not be accessible to users.
Add bucket
Add bucket(s) to your state. Buckets are assignable to a specific user.
Add forward
Add a forward from one state to another. It’s possible to add it to the next workflow state in the ‘list’, or add a forward to a state further down.
Move state
It’s possible to move state in the ‘list’ of states. Just click the icon with the arrows pointing up and down to drag the state above or below another state.

Visual representation workflow
While adding states and buckets, assigning colors and forwards an overview will pop up at the bottom of the page. This is a visual representation of your current workflow.
Round shape
A round shape is a visual representation of a state. A state can have an arrow from either another state or another bucket. Both of them will have the text ‘forward’ next to the line of the forward arrow. If the state has a background color, a color has been assigned to that state.
Square shape
A square shape is a visual representation of a bucket. An arrow will point from a state to a bucket with the text assign next to line of the assign arrow. A bucket can also have a background color, but they inherit the color of the state they’re placed in.
