eDiscovery User Manual
Overview
INDICA aims to provide you with a powerful document review tool in a simple and user-friendly manner. For you to have a better user experience with INDICA eDiscovery, it is important to familiarize yourself with INDICA’s main features. This manual outlines INDICA’s capabilities and walks you through how you can best use INDICA for document review.
Login & Credentials
INDICA uses a web-based interface, you can easily login in with the information provided by your system administrator.
Confirm your credentials with the INDICA administrator.
We recommend you use Chrome as a default browser to access INDICA.

Main Tabs and Workflow
1. Main tabs
On the top of INDICA interface you can find a list of tabs contains the main document review page and all data collections loaded. Click on the tab and your will be navigated to the review page of corresponding documents.
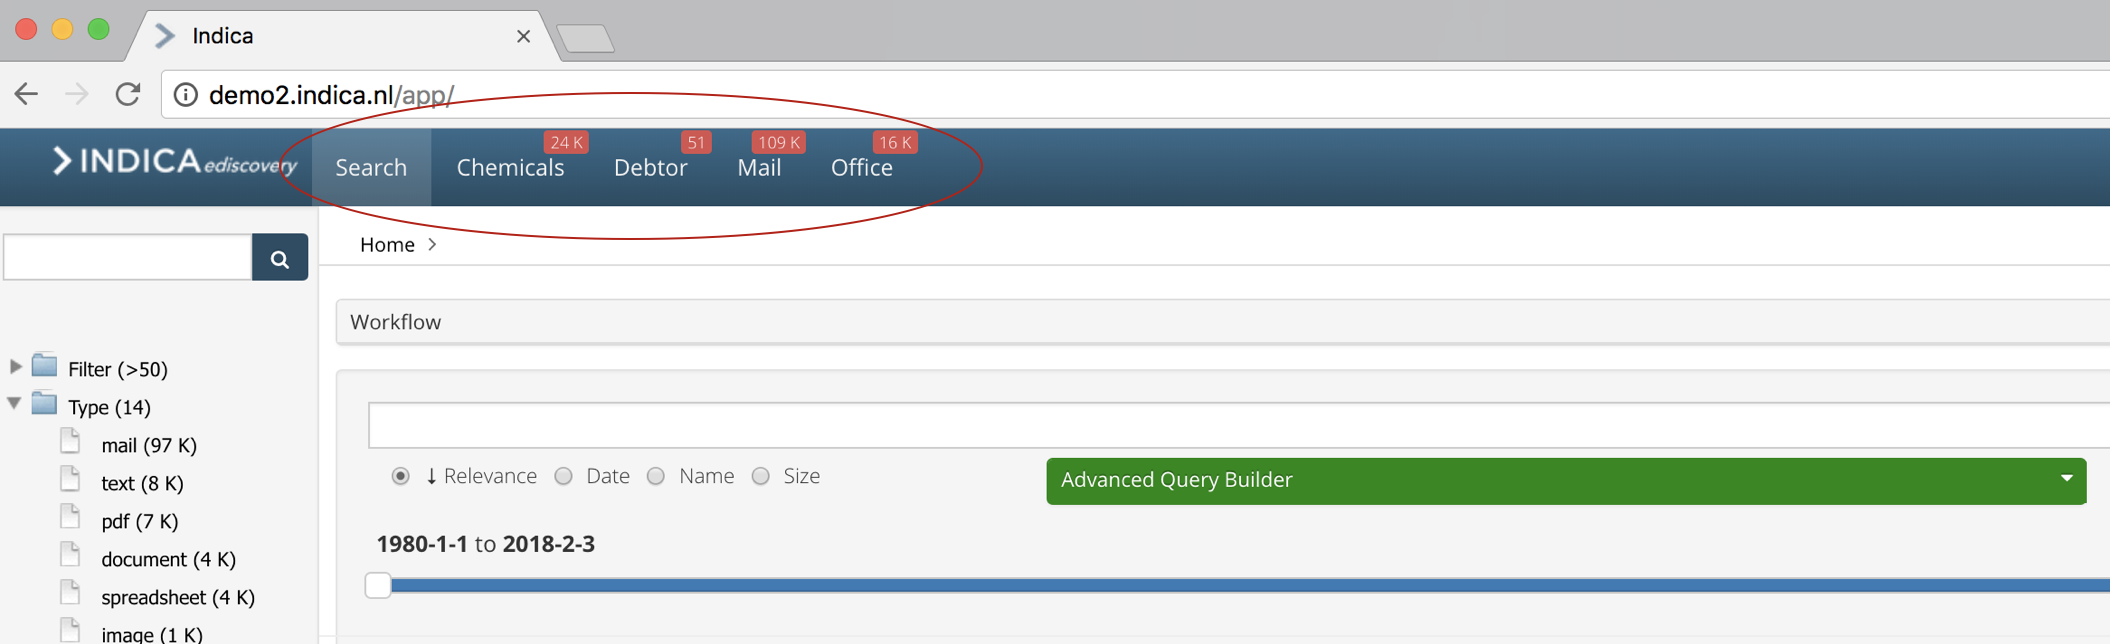
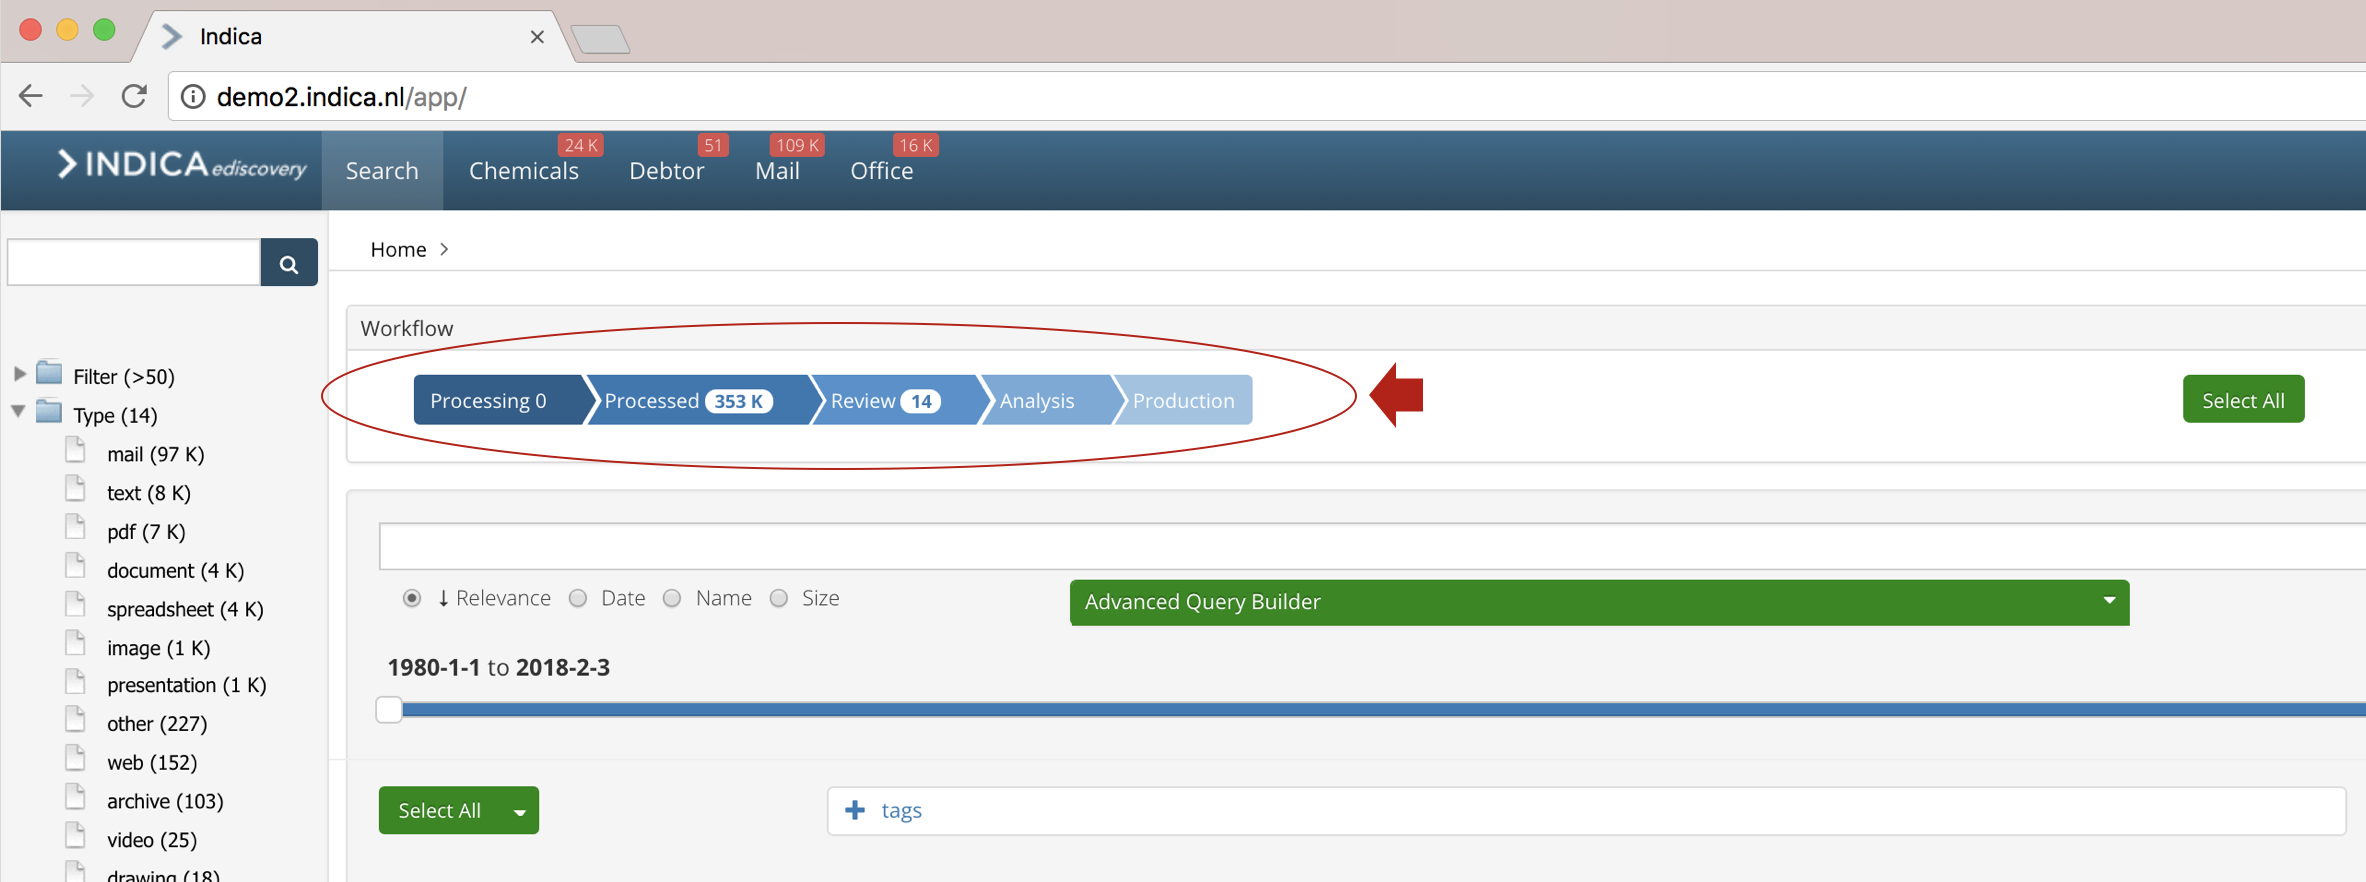
2. Workflow
You can track your working progress in the workflow bar right below the main tabs. INDICA can show you the current status of your data and their corresponding volume.
Search and Query Panels
While conducting your document review in the main review page, you have a variety of flexible options to filter your data using the search panel, advanced query builder, timeline filter, filter panel or INDICA visual analytics. All searches can be saved for later review and repeated use.
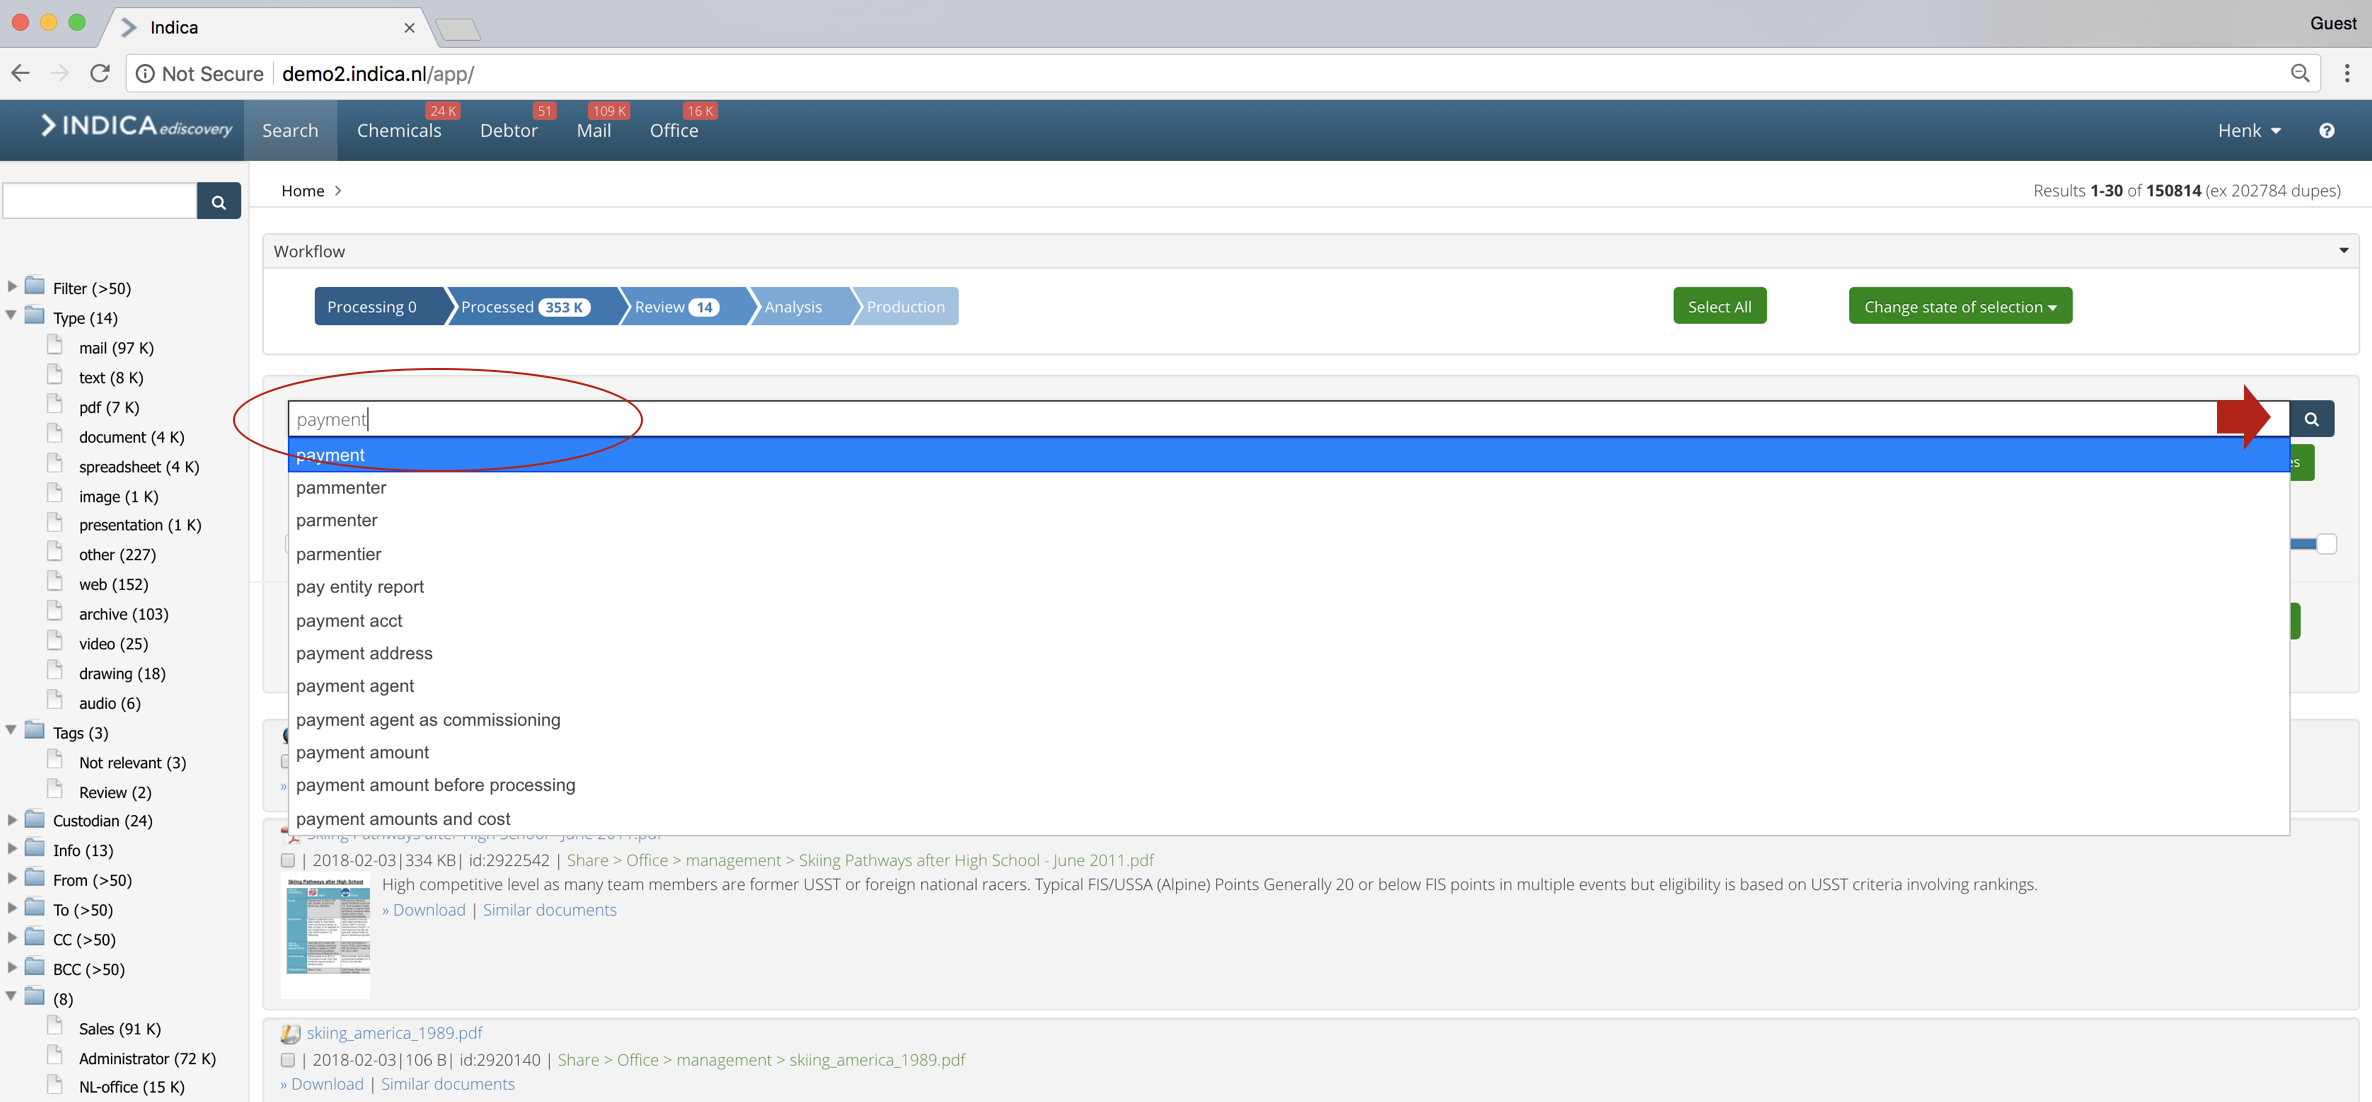
1. Search Panel
Enter the keywords or queries you have in mind in the Search Panel, click the search button and INDICA will present you with all relevant documents in the main review page upon your request. The documents are ranked upon relevance by default, you also have the option to rank them by Date, Name or File Size.
2. Advanced Query Builder
To filter by advanced queries, click the Advanced Query Builder. Here you will have the options to group and run multiple queries with different rules. First, enter the queries you want to use for searching and click ‘Build’, then click on ‘Search’ to review the result of your queries. To rest your queries, click ‘Reset’.

3. Timeline Filter
INDICA designed a timeline filter bar on this page specially for your ease of use. By simply drag and drop the timeline bar you can easily review the documents in specific time period.

4. Filter Panel
On the left side on the main review page, you can find the filter bar which contains more detailed filters to limit your data. INDICA categorizes documents based on document type, tags that are assigned to the documents, email meta information (from, to, cc and bcc) and more. You can filter through your data using these categories and get the relevant results.

**5. Visual Filters **
INDICA built-in visual analytics provides you with various and powerful ways to filter and get insight of your data.
- World Map
In the World Map section, you can get a straightforward overview of how documents were geographically communicated. The blue dots on the world map represents the presence of email communication, and the size of the dots represents the volume of communication. Hover above the blue dots you can see the meta data of the communication. The blue dots also work as visual filters, where you can simply click on one dot to review the corresponding documents.

- Show Relations

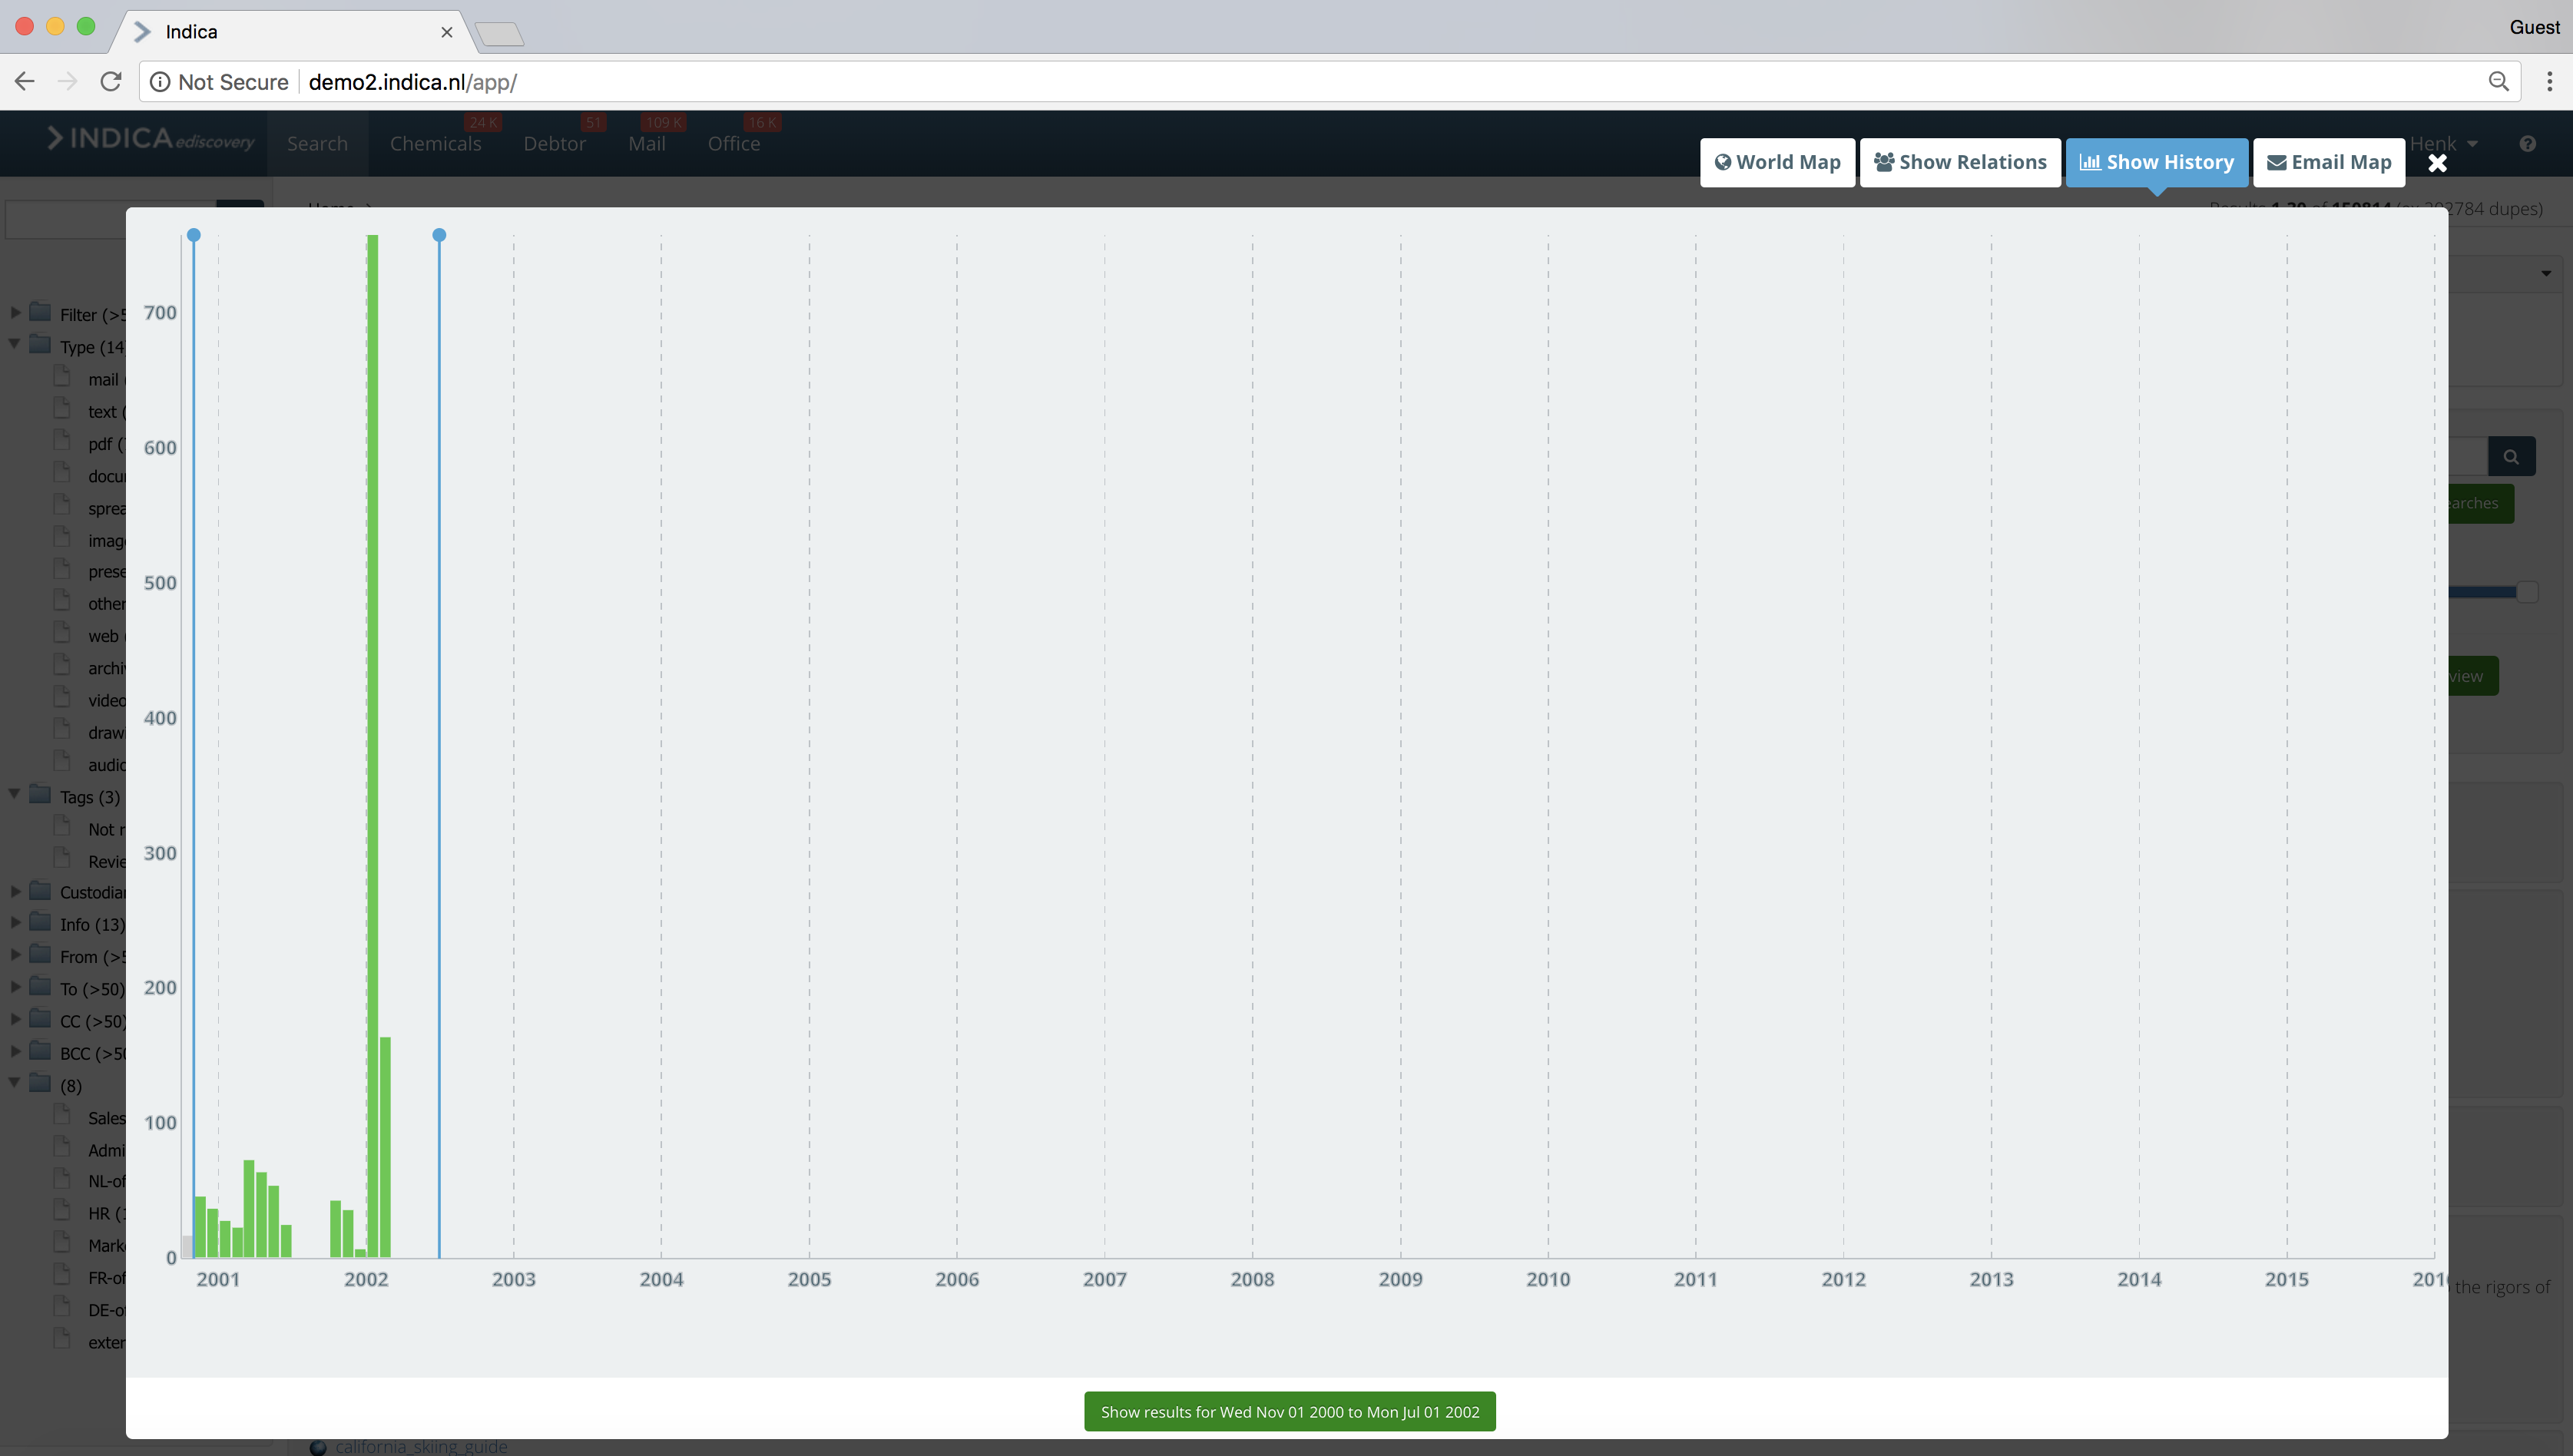
- Show History
In this section, you can easily detect the communication trend over the time. The size of the bar represents the volume of communication, and it also works as visual filters, where you can simply drag and select on the timeline to review the corresponding documents.
- Email Map
The Email Map connects all entities and visualizes their email communication, you can also choose to see the email communication in certain time period by filtering in the History Chart below.
Noted that due to the large amount of communication, the Email Map can be very crowded. We recommend you use this function after initial search or filter to get the best experience.

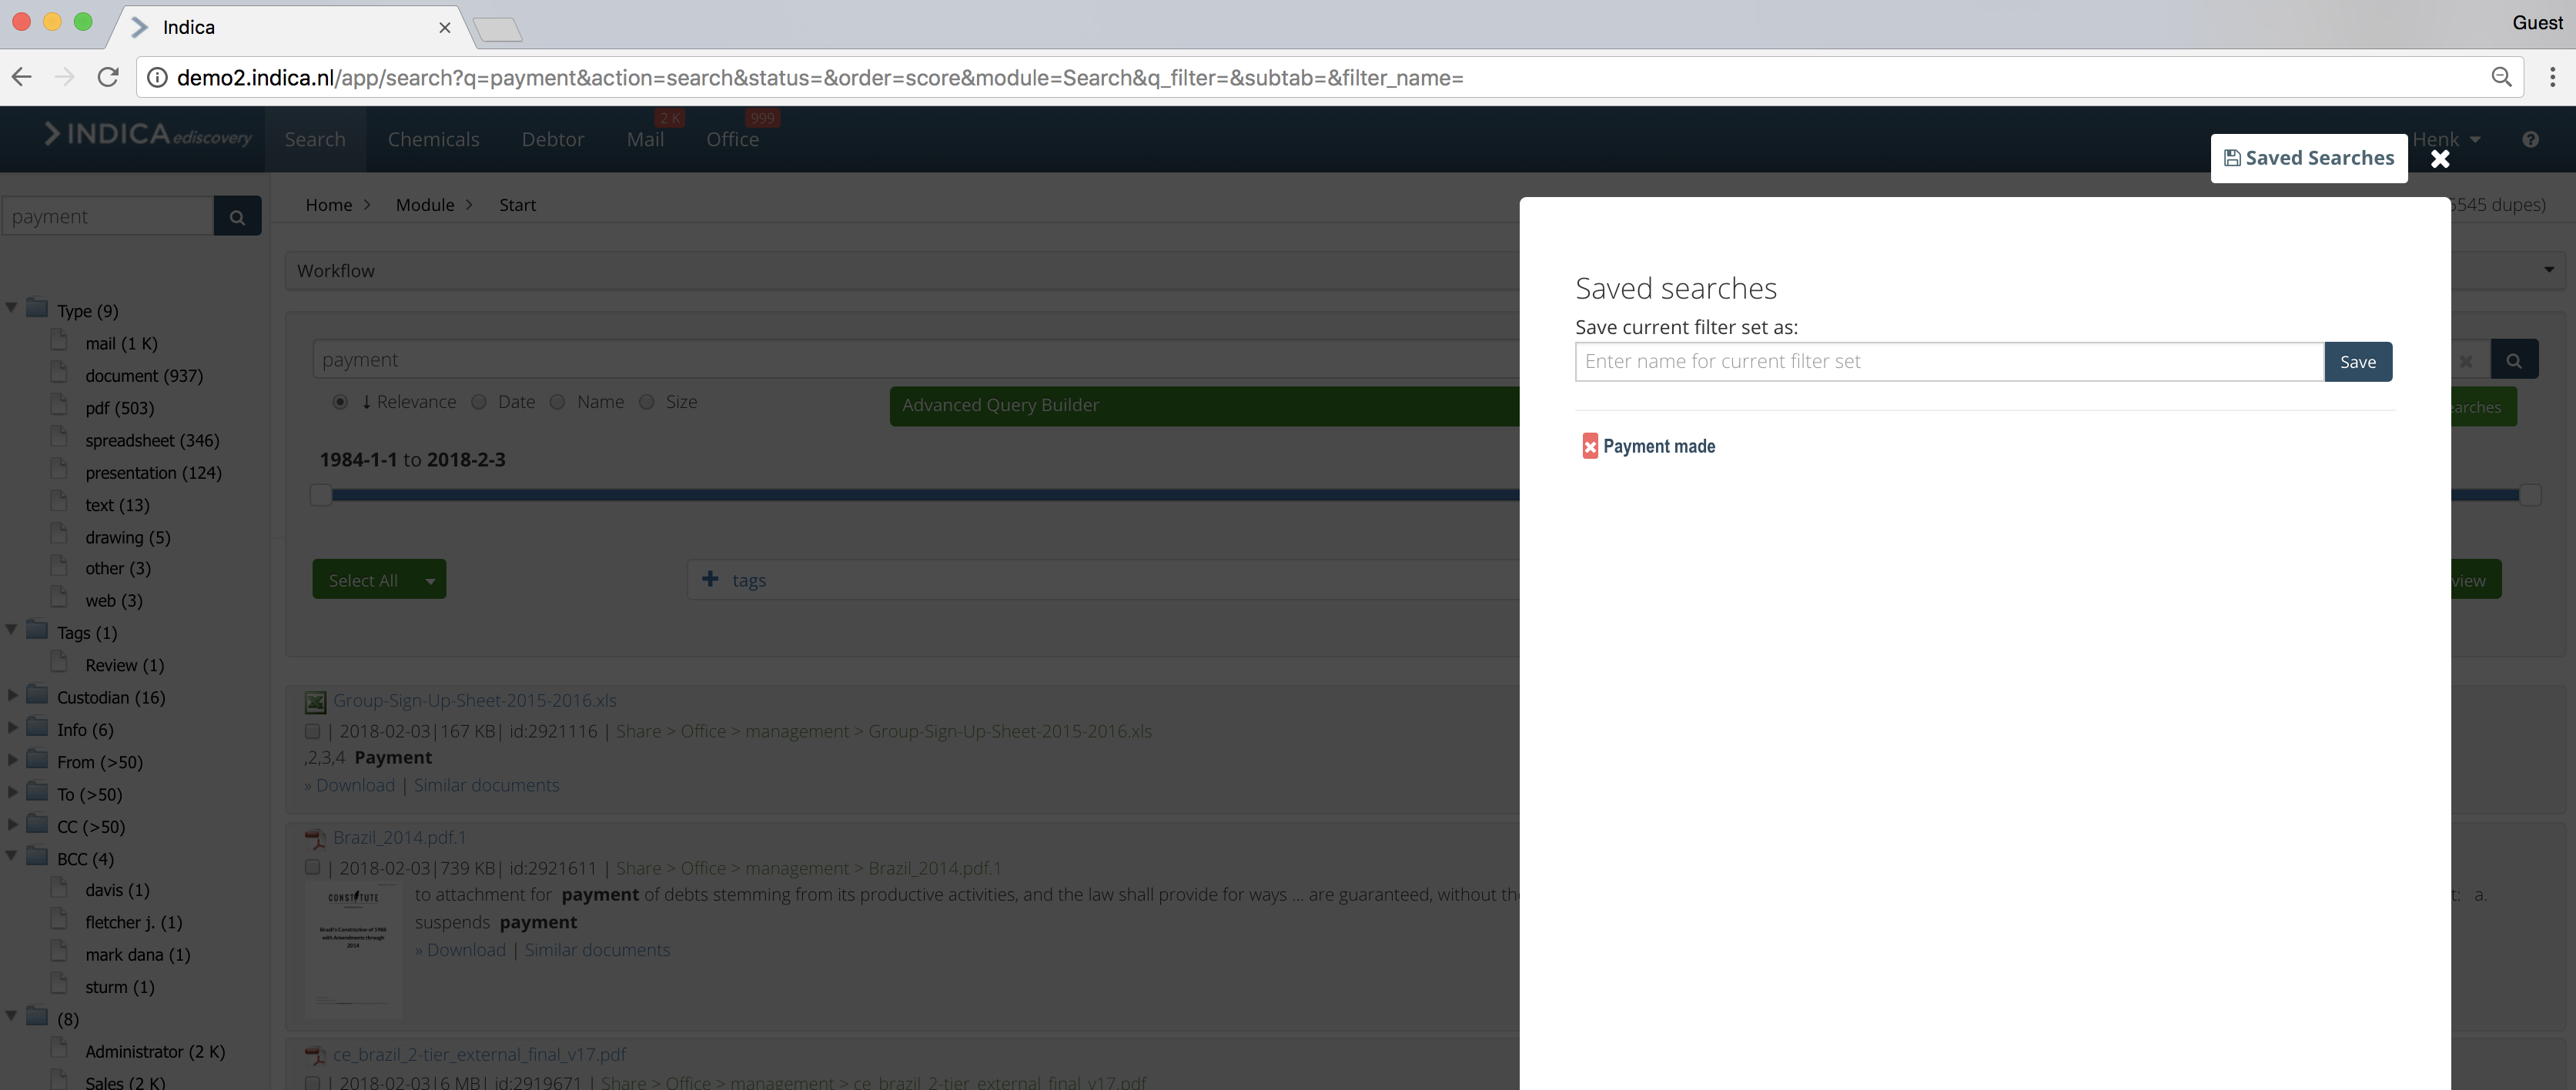
**6. Saved Searches **
On the right side of the visual filters you can find the Saved Searches function, where you can name and save all your searches/filtered results for repeated use. INDICA will run continuously on your data index to provide you with the most updated results whenever you access the saved searches.
7. Advanced search functions ??
Document Review
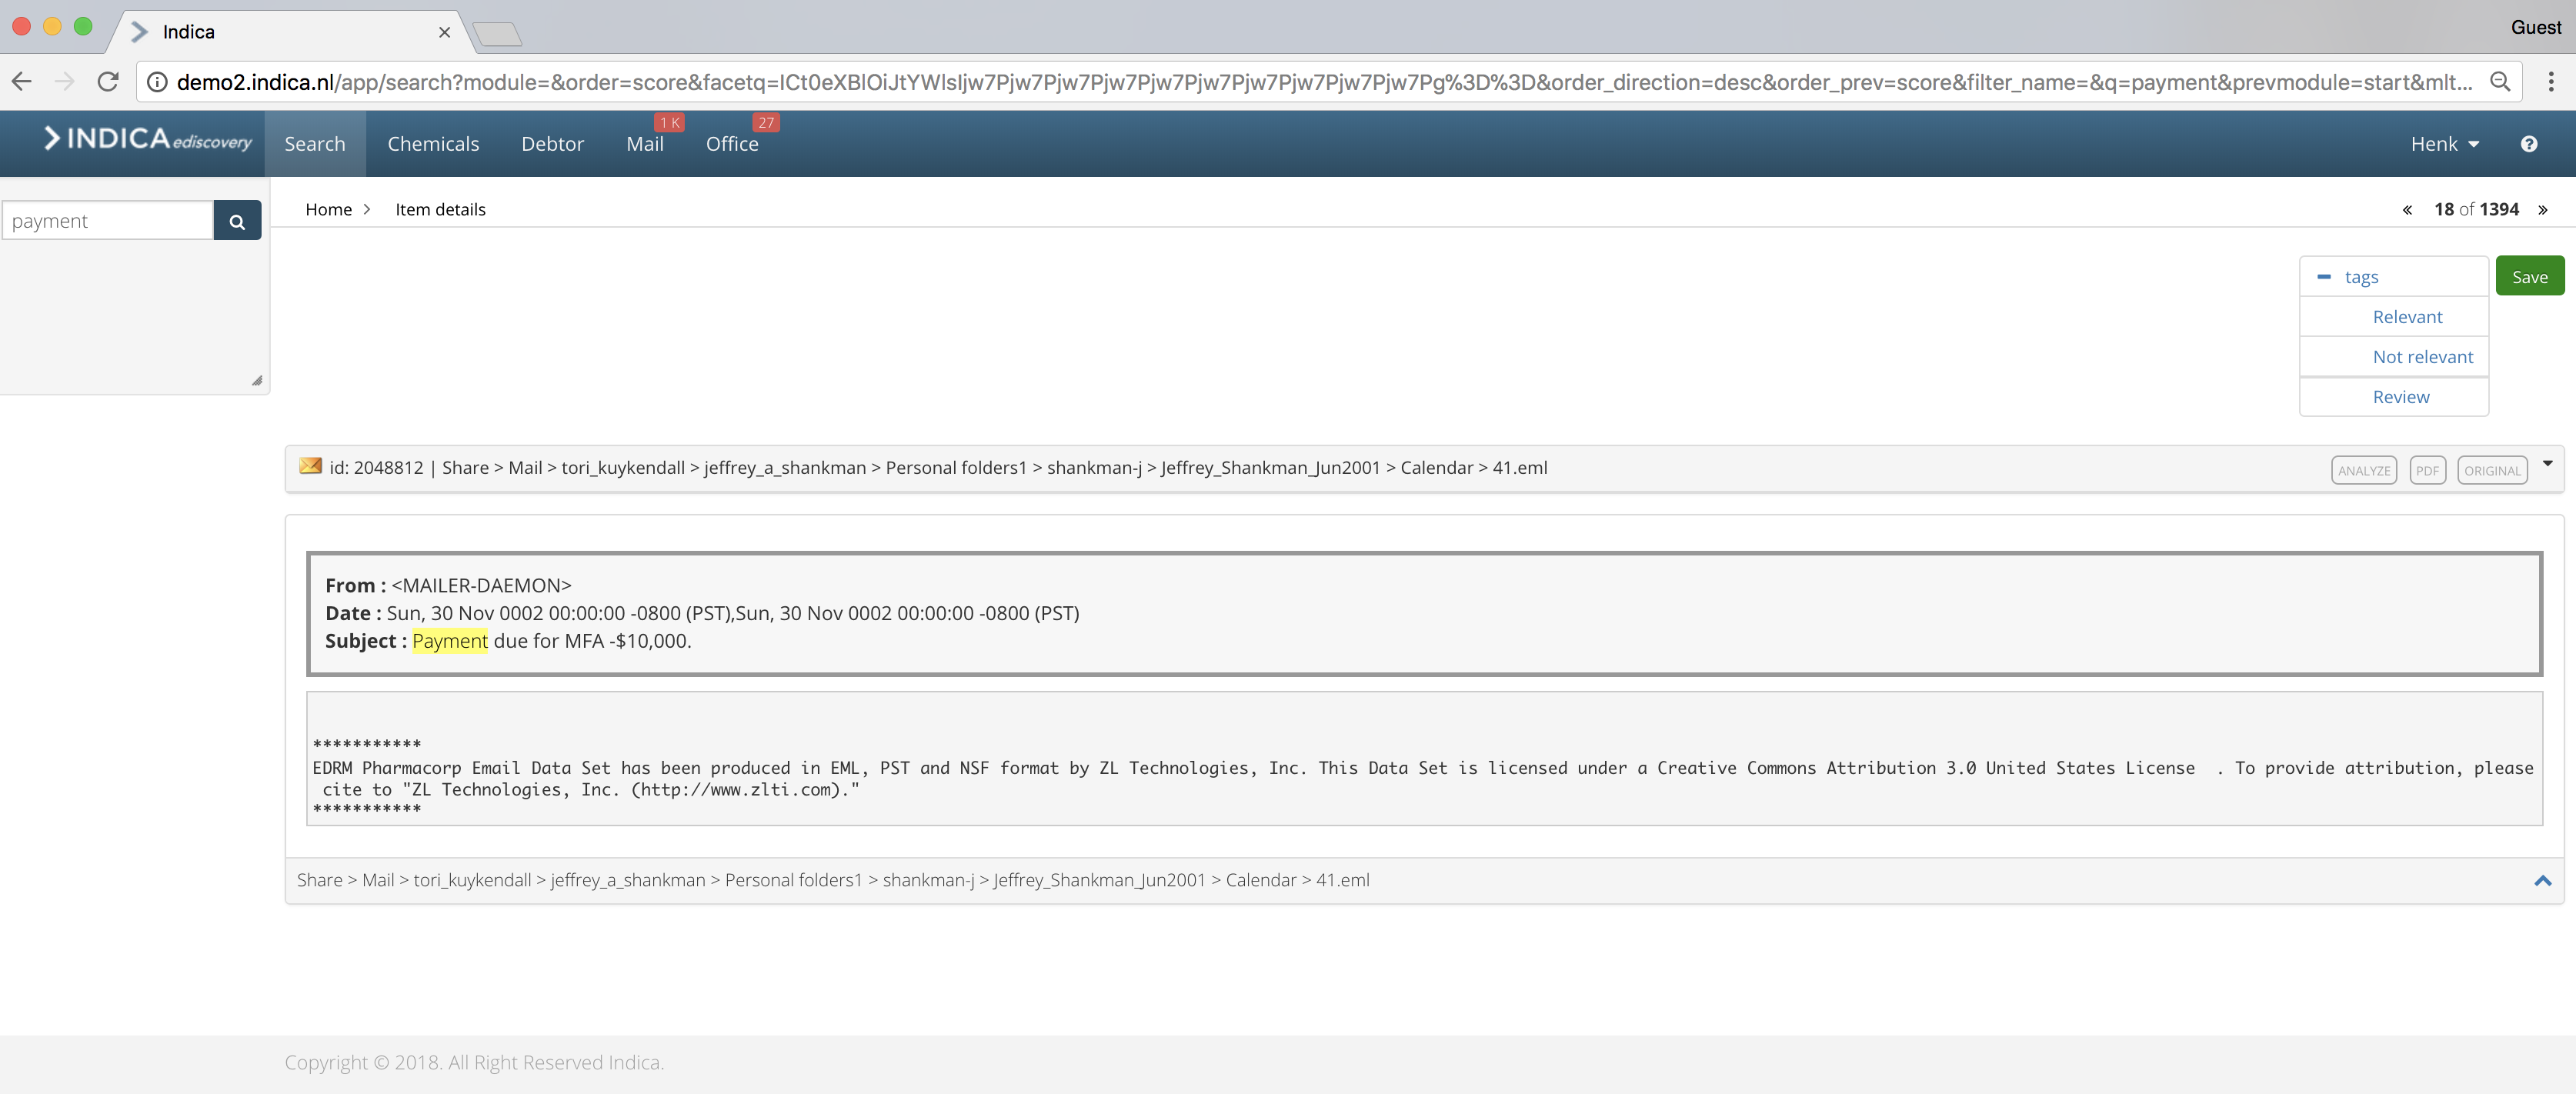
After applying key words and filters, you are ready for the document review. INDICA provides you with flexible choices of viewer modes, from the main review page to the individual document review page. You will be able to choose from the viewer format that best suits your preferences, including extracted text, PDF, original and etc. INDICA also designed a Analyze function in the individual document review page to help you review in a more intelligent manner.
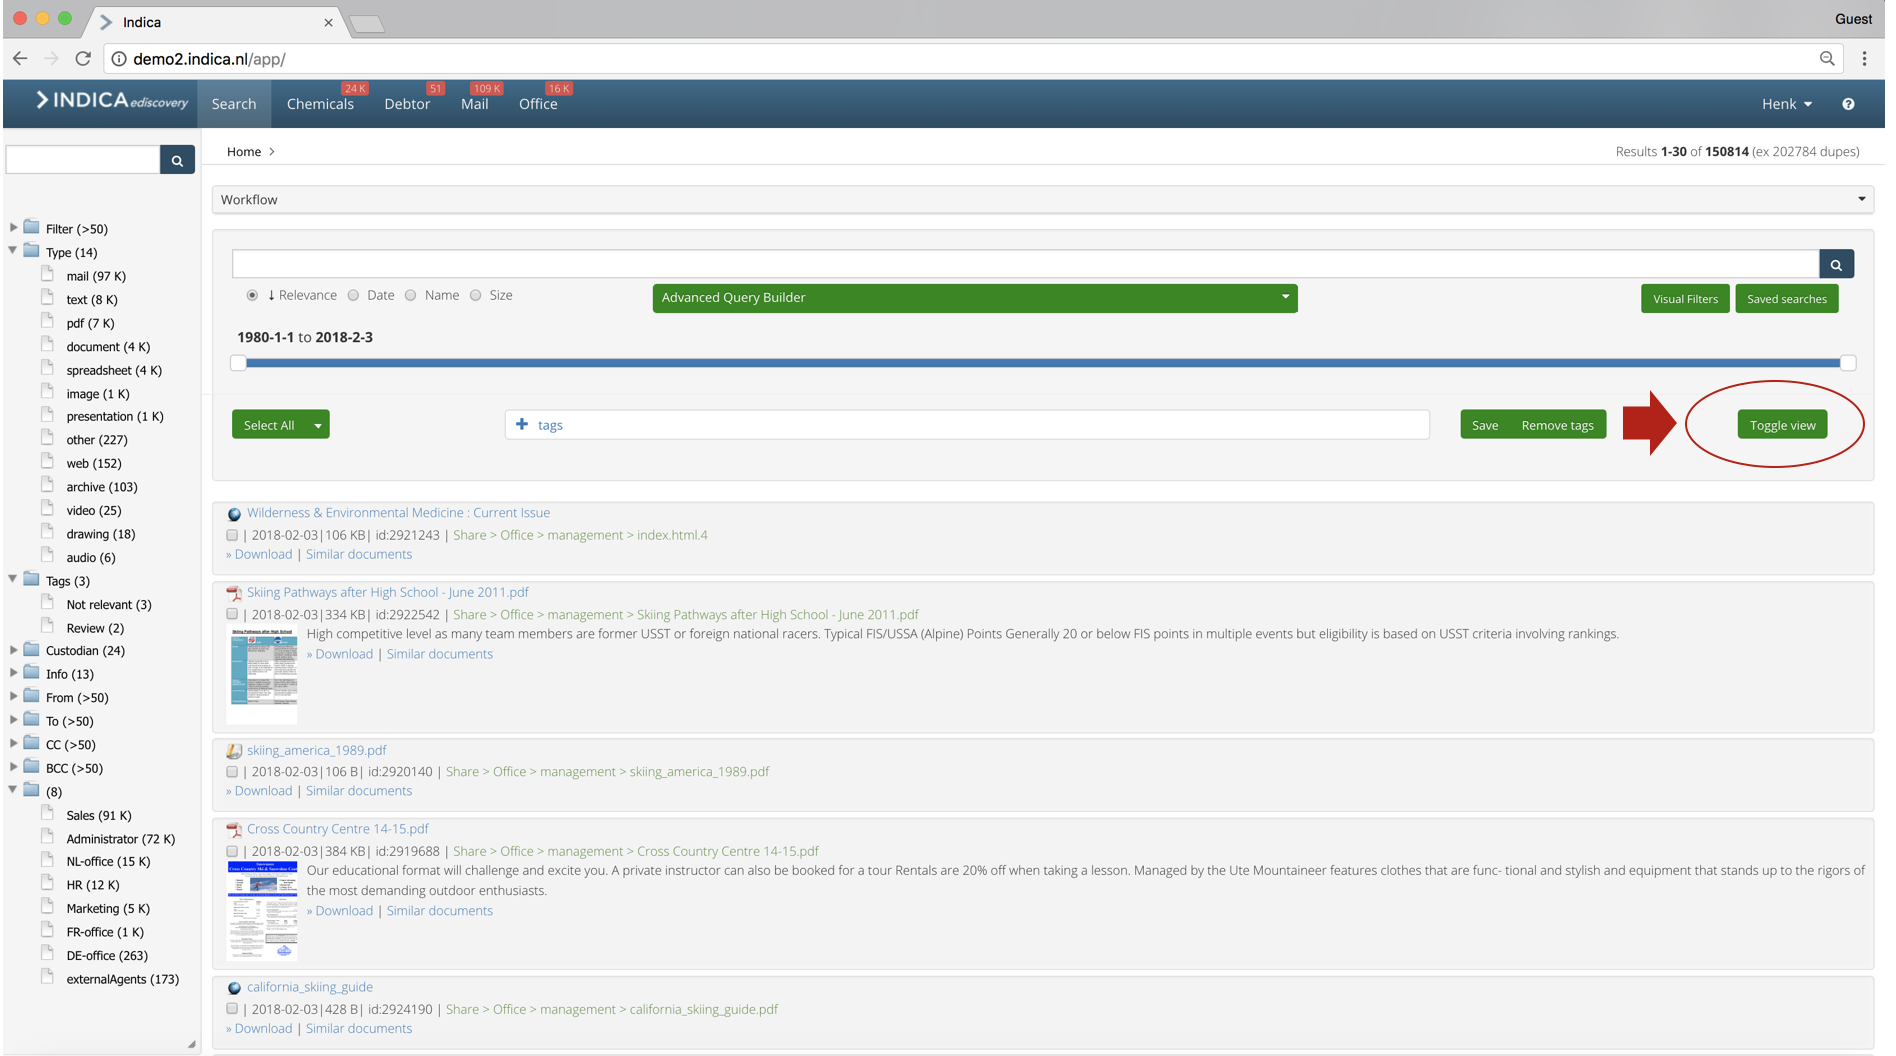
1. Main Review Page
The main review page displays the workspace documents with a ‘Toggle View’ option. Prior to deploying the ‘Toggle View’ option, you will be able to see the list of documents with limited meta information such as the document name, date of communication, size of document, document ID and document location. Clicking on the ‘Toggle View’, INDICA will show you a preview of the documents including the email domain, subject, limited content of the email body and an image of the attachments. You will also have to option to directly download the document or search for similar documents in Toggle view.
2. Extracted Text Mode (not sure it’s the name, ASK STEPHAN)
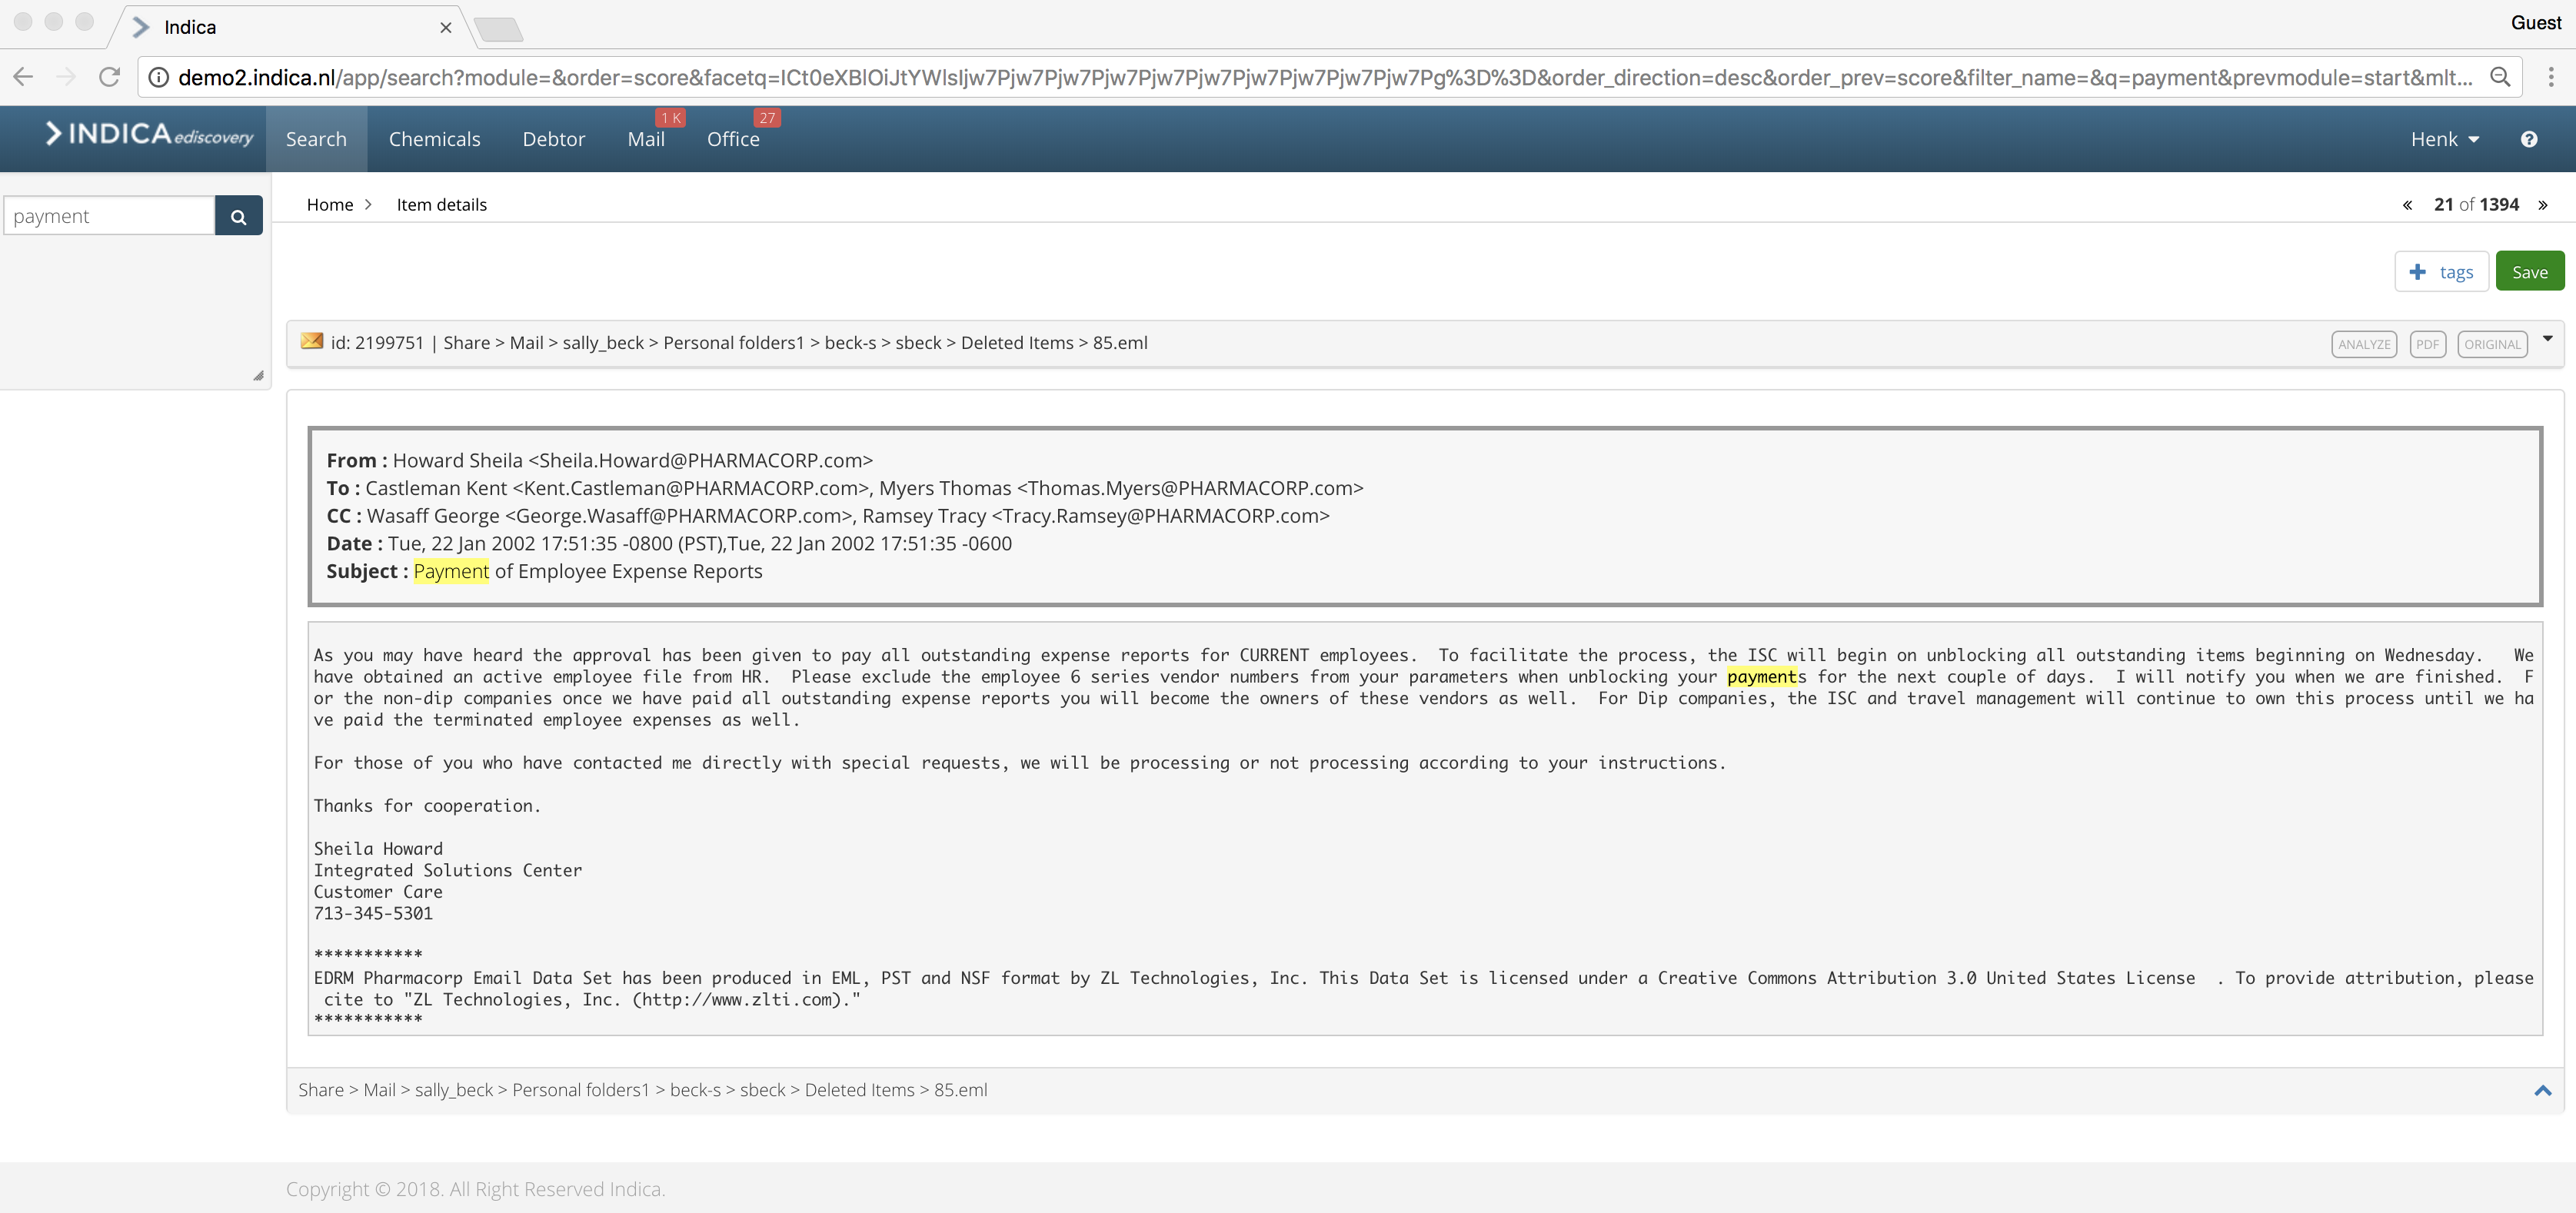
When you click and open a document for review, INDICA will by default show you the extracted text in an ‘easy for the eye’ format, you can quickly browse the document content in this mode. If you have applied any key words at this stage, they will be automatically highlighted in the document.
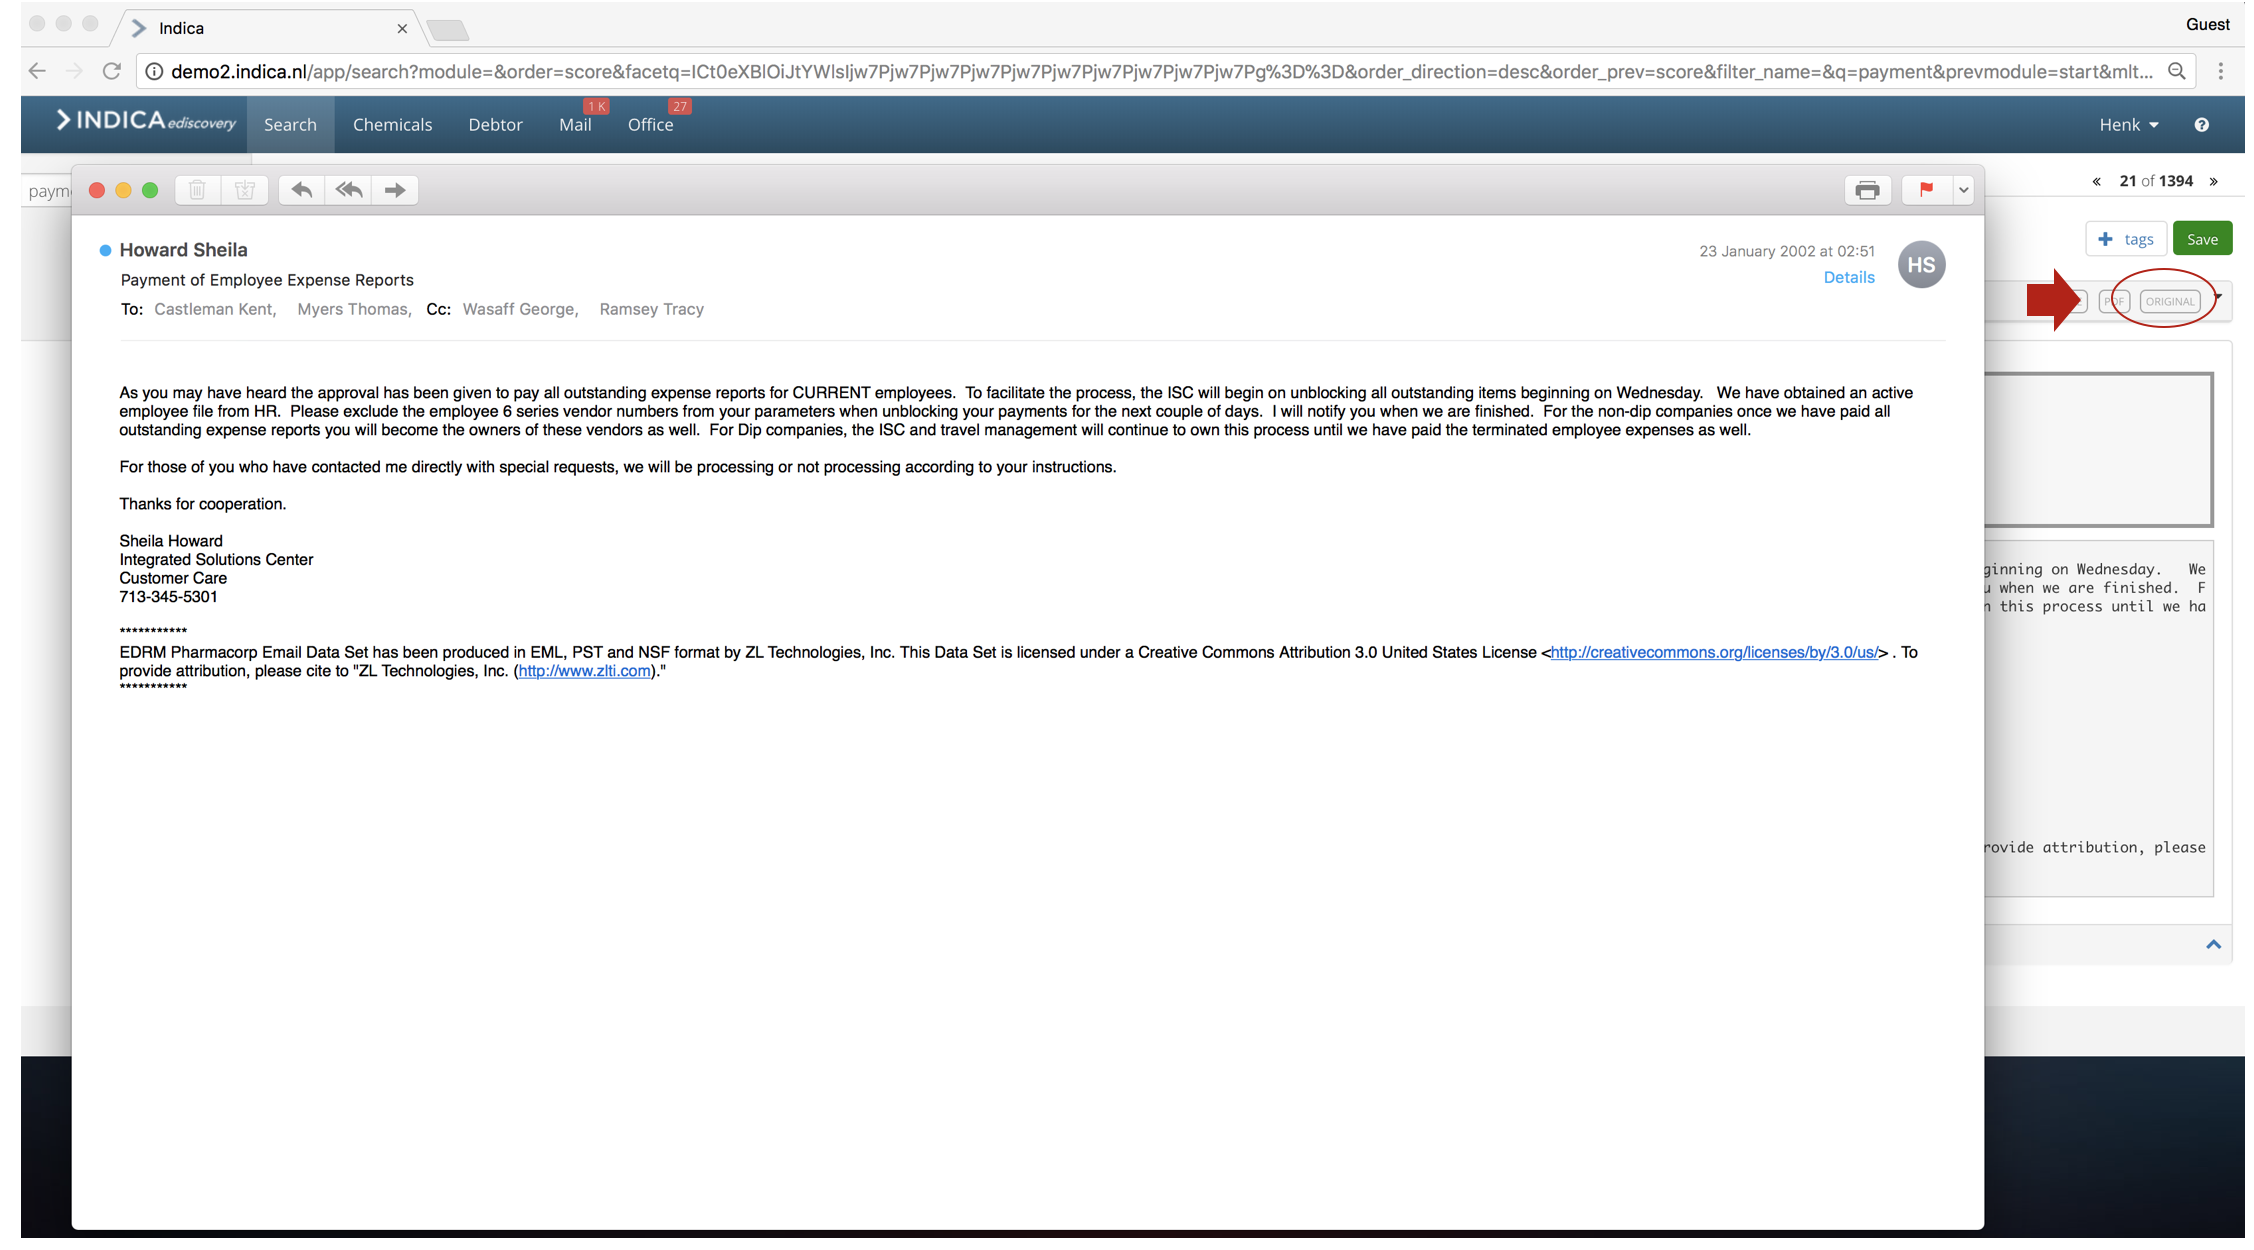
3. PDF Mode
The PDF mode allows reviewers to open the document in their local PDF reviewers, where they can easily review and preserve it.
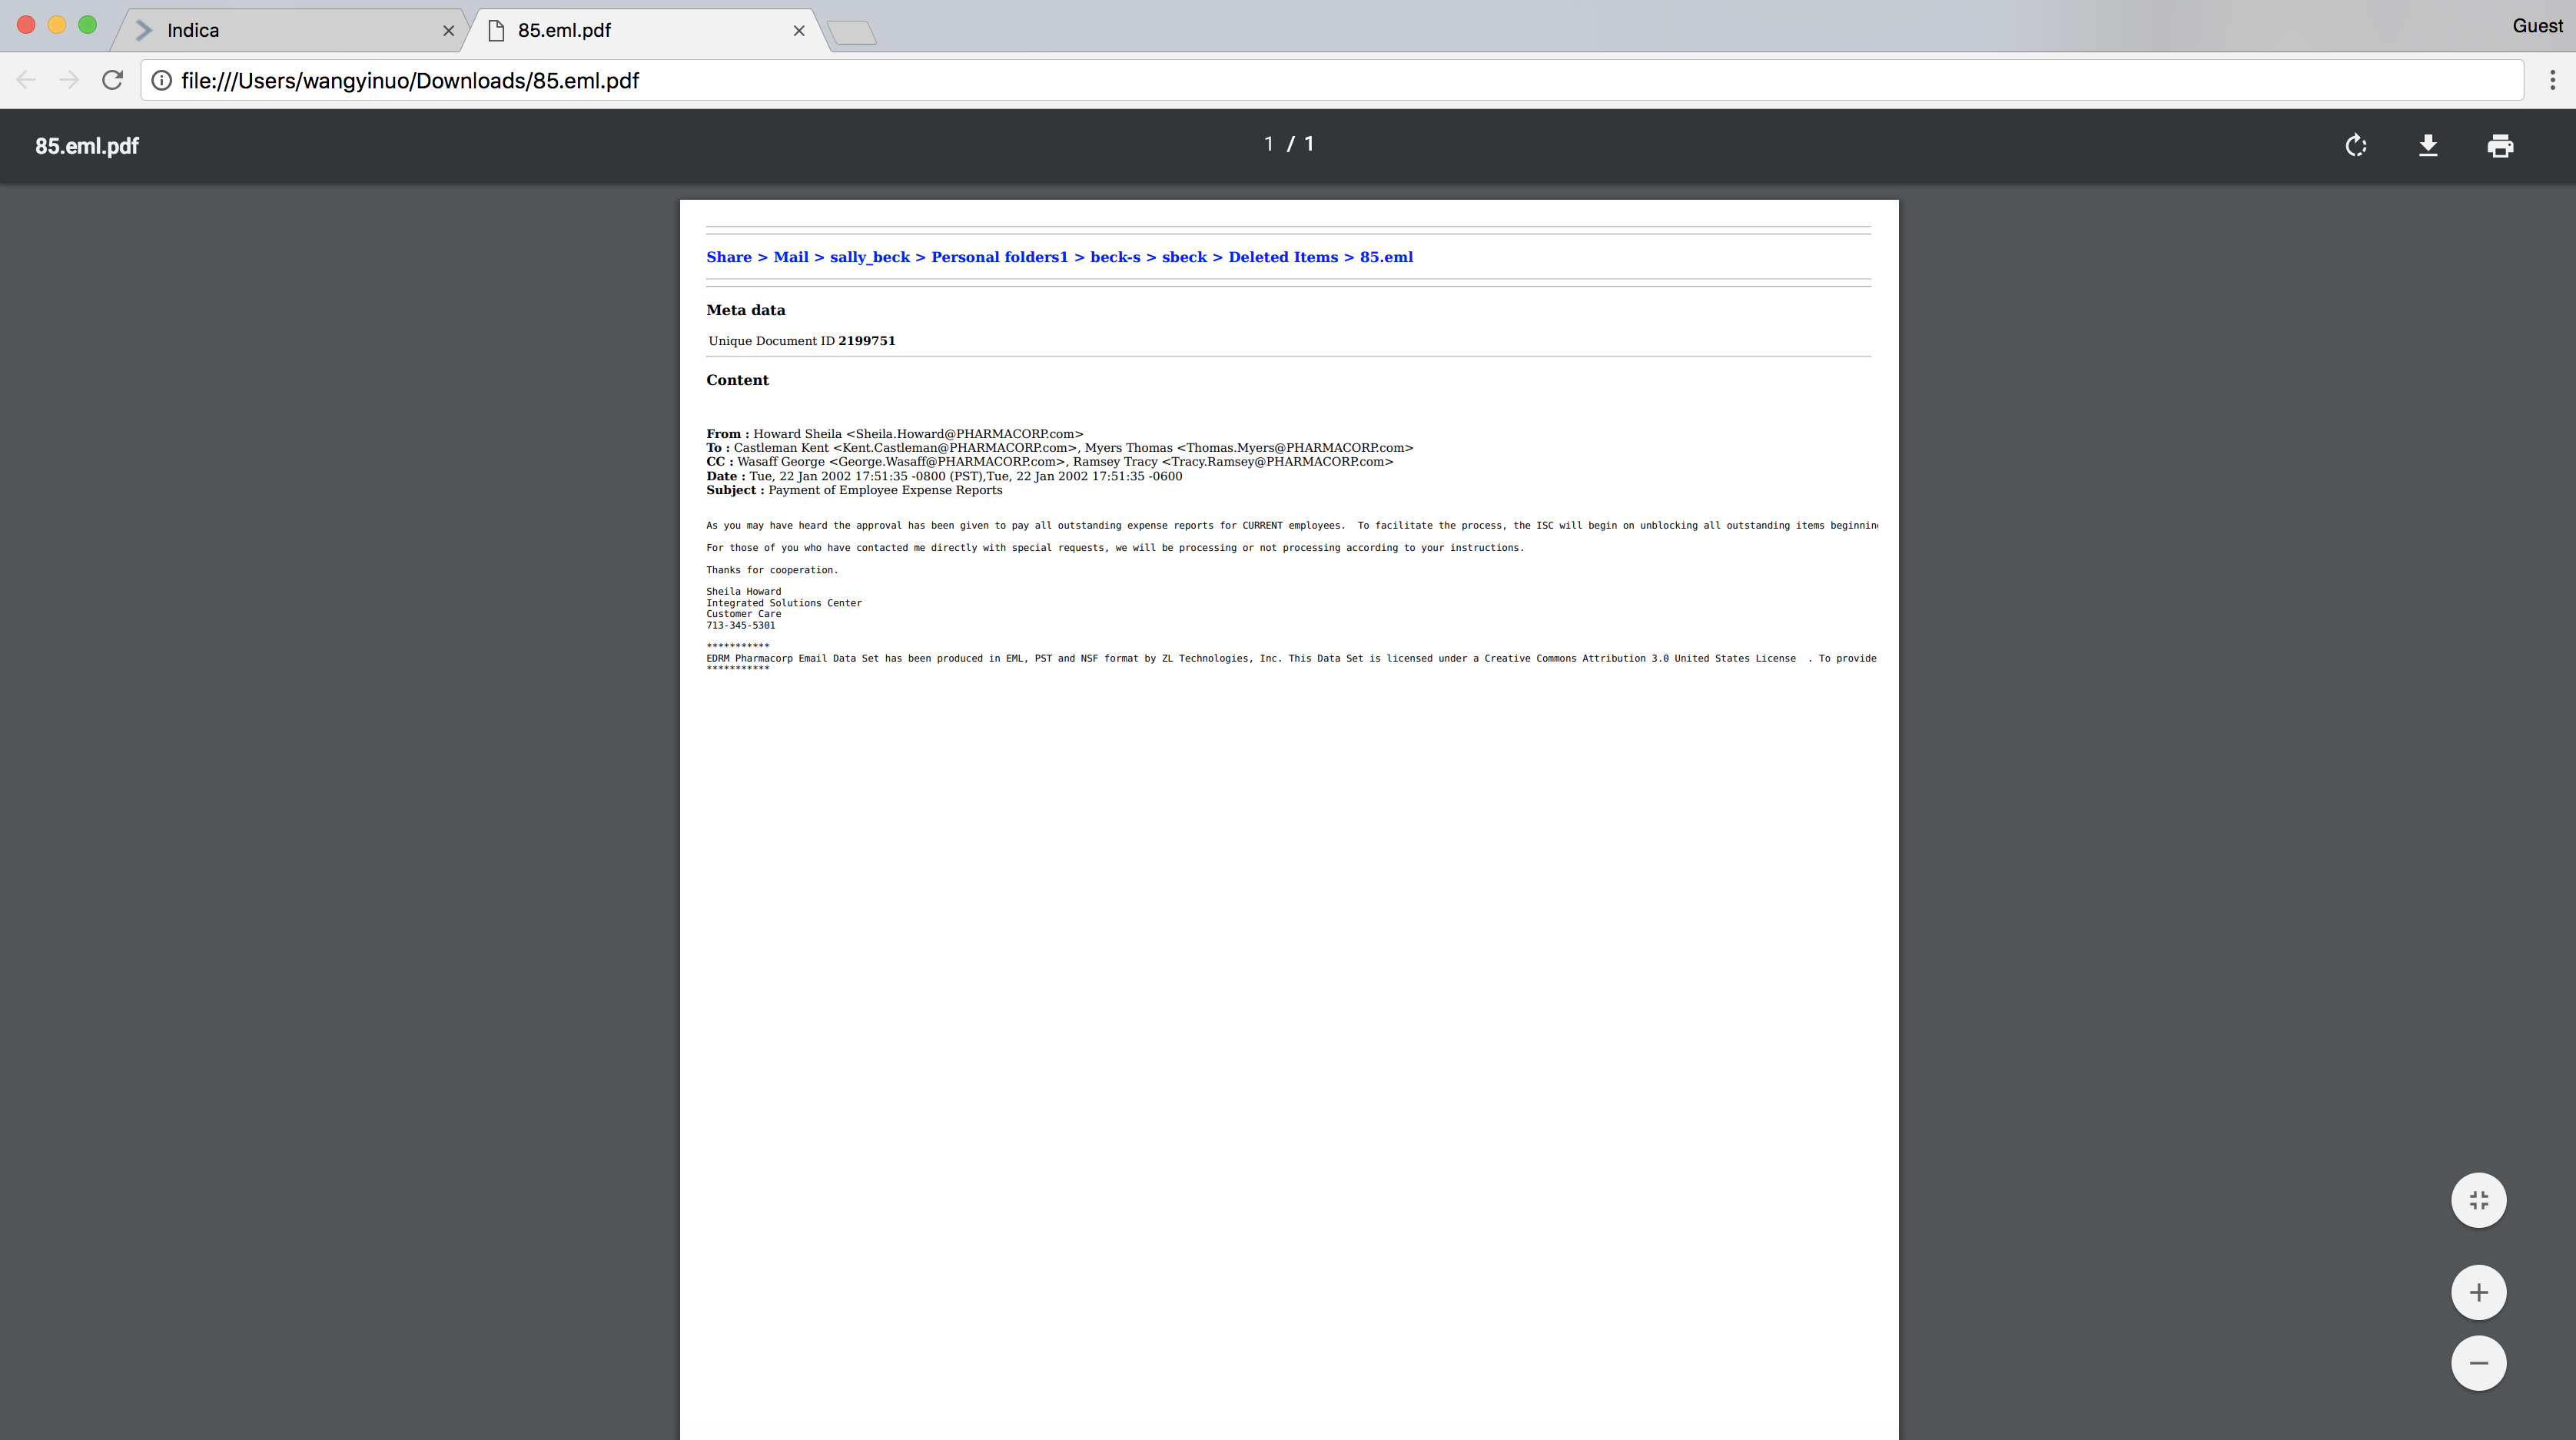
4. Original Mode
To see the document in its native format, click on ‘Original’ and INDICA will automatically present it to you.
5. Analyze Function
INDICA specially designed the ‘Analyze Function’ within the document review page, where you can highlight a certain part of the email, click ‘ANALYZE’ and search for relevant information through all file shares stored in your INDICA workspace. The system will automatically list down all relevant documents where you can simply click for review, this function will fasten your review work as well as find more relevant information across your data.

Tagging
Tagging function is available in both main review page and the individual review page. All tags are customizable by your INDICA administrator on a case-to-case base
**1. Tagging in Main Review Page **
On the main review page, you will have the option to mass-tag/remove tags on all documents or the documents on a single page. After deploying the keywords or filters, you can tag all listed documents simply by clicking the ‘Select All’ button, add tags and save them. To remove the tags, click the ‘Remove tags’ button.

**2. Tagging in the Individual Document Review Page **
When reviewing an individual document, you can assign multiple tags to it by clicking the ‘+ tags’ button and then the ‘Save’ button.
THINGS TO ADD AFTER ASKING STEPHAN:
Early case assessment
Production & report