System
Overview
System settings allow you to manage user access, set-up/edit/delete cases, as well as customize general settings.

Users
In this section, you will be able to get an overview of all user information, search for and add new users, edit/delete existing users. Reset user passwords is only available if you are using the internal user database (System/General Settings).
Note that in case you use AD, please refer to chapter 4.2.4- Open and Active Directory Settings. If you use internal database, please refer to chapter 4.2.7- General Settings.

1. Add new users
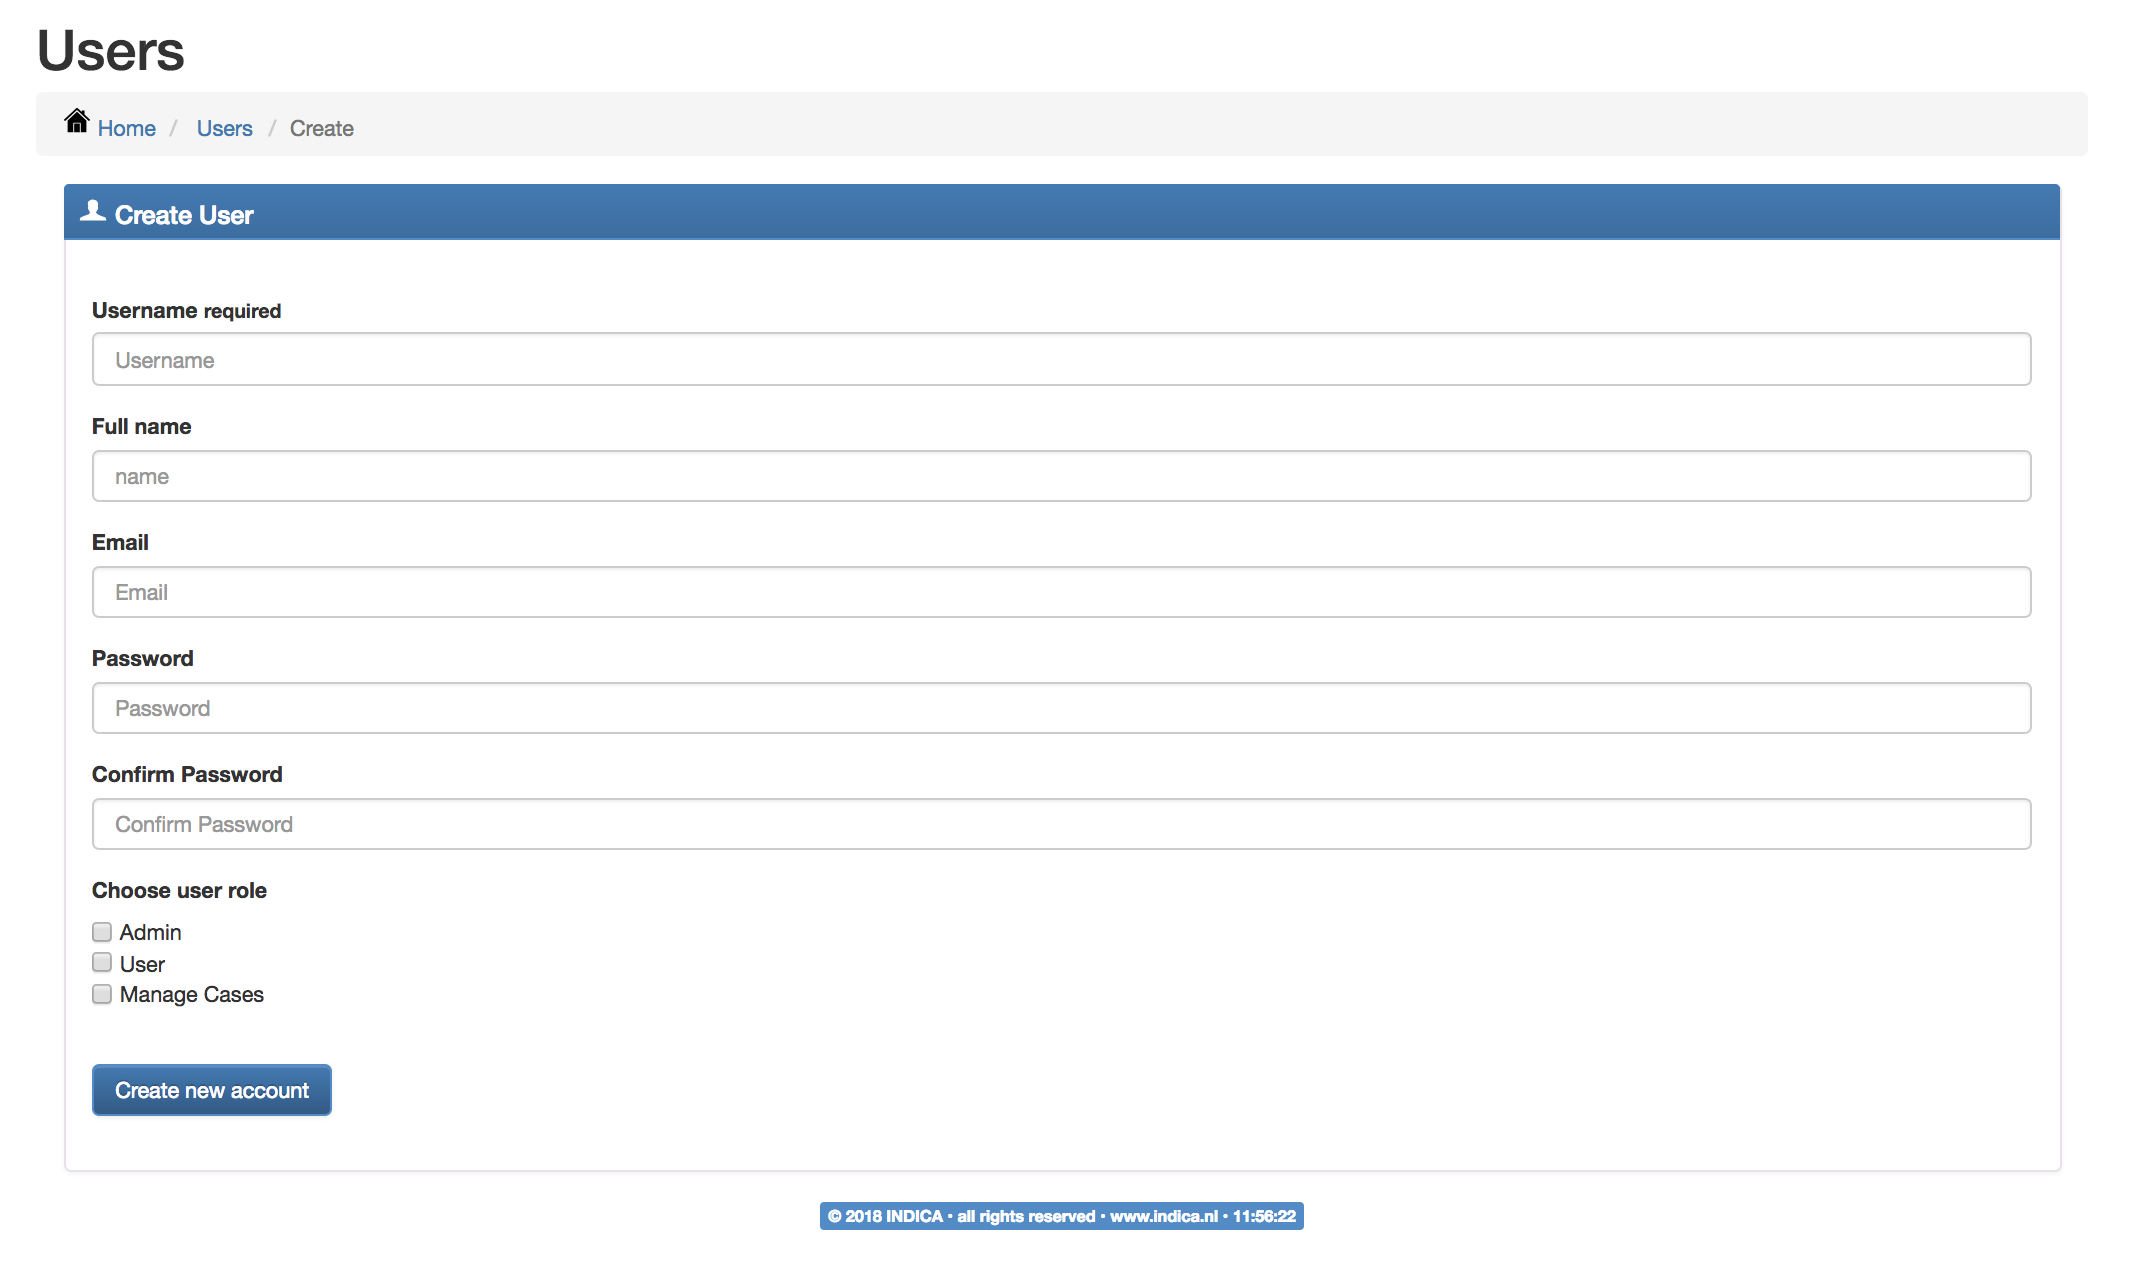
To add new users, simply click the ‘Add New +’ button on the top left side of the page, fill in the user information and choose a role for this user. Check the user information filled in, then click ‘Create new account’ to complete the process. New user information will be shown instantly at the User page once this action is completed.
- Admin: this role will grant user administrative rights, this user will be able to change INDICA settings, manage users and cases.
- Manager: this role will grant user the right to access INDICA case backend and manage cases.
- User: this role will only grant user the rights to access INDICA frontend and review certain cases assigned by administrators.
2. Edit user information and assign cases
Click the ‘Edit’ button on the right side of the page to edit information of existing users. Here you have the options to edit user name, full name and email. You can also change the role of this user by ticking the boxes below, as well as edit this user’s access to certain cases. You can assign a case to this user by selecting one or more cases, use ‘CTRL’ button on your keyboard to select multiple cases. Click on ‘Save Changes’ to complete this action and all changes will be instantly reflected on the User page.

3. Delete user
To delete existing users, simply click on the ‘Delete’ button on the targeted user panel. All changes will be instantly reflected on the User page.
4. Reset password (for internal databases only)
Click on the ‘New PW’ button on the right side of the page and a pop-up window will be shown to you for password reset. To complete the process, simply fill in the new password and click ‘Submit’. If you use AD and want to reset a password, please change it according to your internal procedures.


Cases
In this page, you can see the overview information of all cases in your INDICA environment. You have the option to add new cases, edit/delete/archive existing cases, restore archived cases and search for a certain case in the search panel. Also, you can enable backup per case and if you have an activation key that starts with 402 or greater, you can enable the GDPR module here. Read about GDPR in the GDPR manual. Disabling the spider option will prevent new items to be discovered. Usually this is done after initial indexation of a case.

1. Add new case
To add a new case in INDICA, simply click on the ‘+’ button and you will be redirected to the page below. Fill in the case information and assign user/manager groups in the AD panels. Users will have the access to INDICA eDiscovery front end while Managers will also have the access to INDICA eDiscovery manage backend. Click ‘Enabled’ to activate or deactivate the case and click ‘Create’ to complete this process. All changes will be instantly reflected in the Cases page. In case you apply internal databases, please leave the ‘Select AD Group for Users’ and ‘Select AD Group for Managers’ sections at default.

2. Edit case information
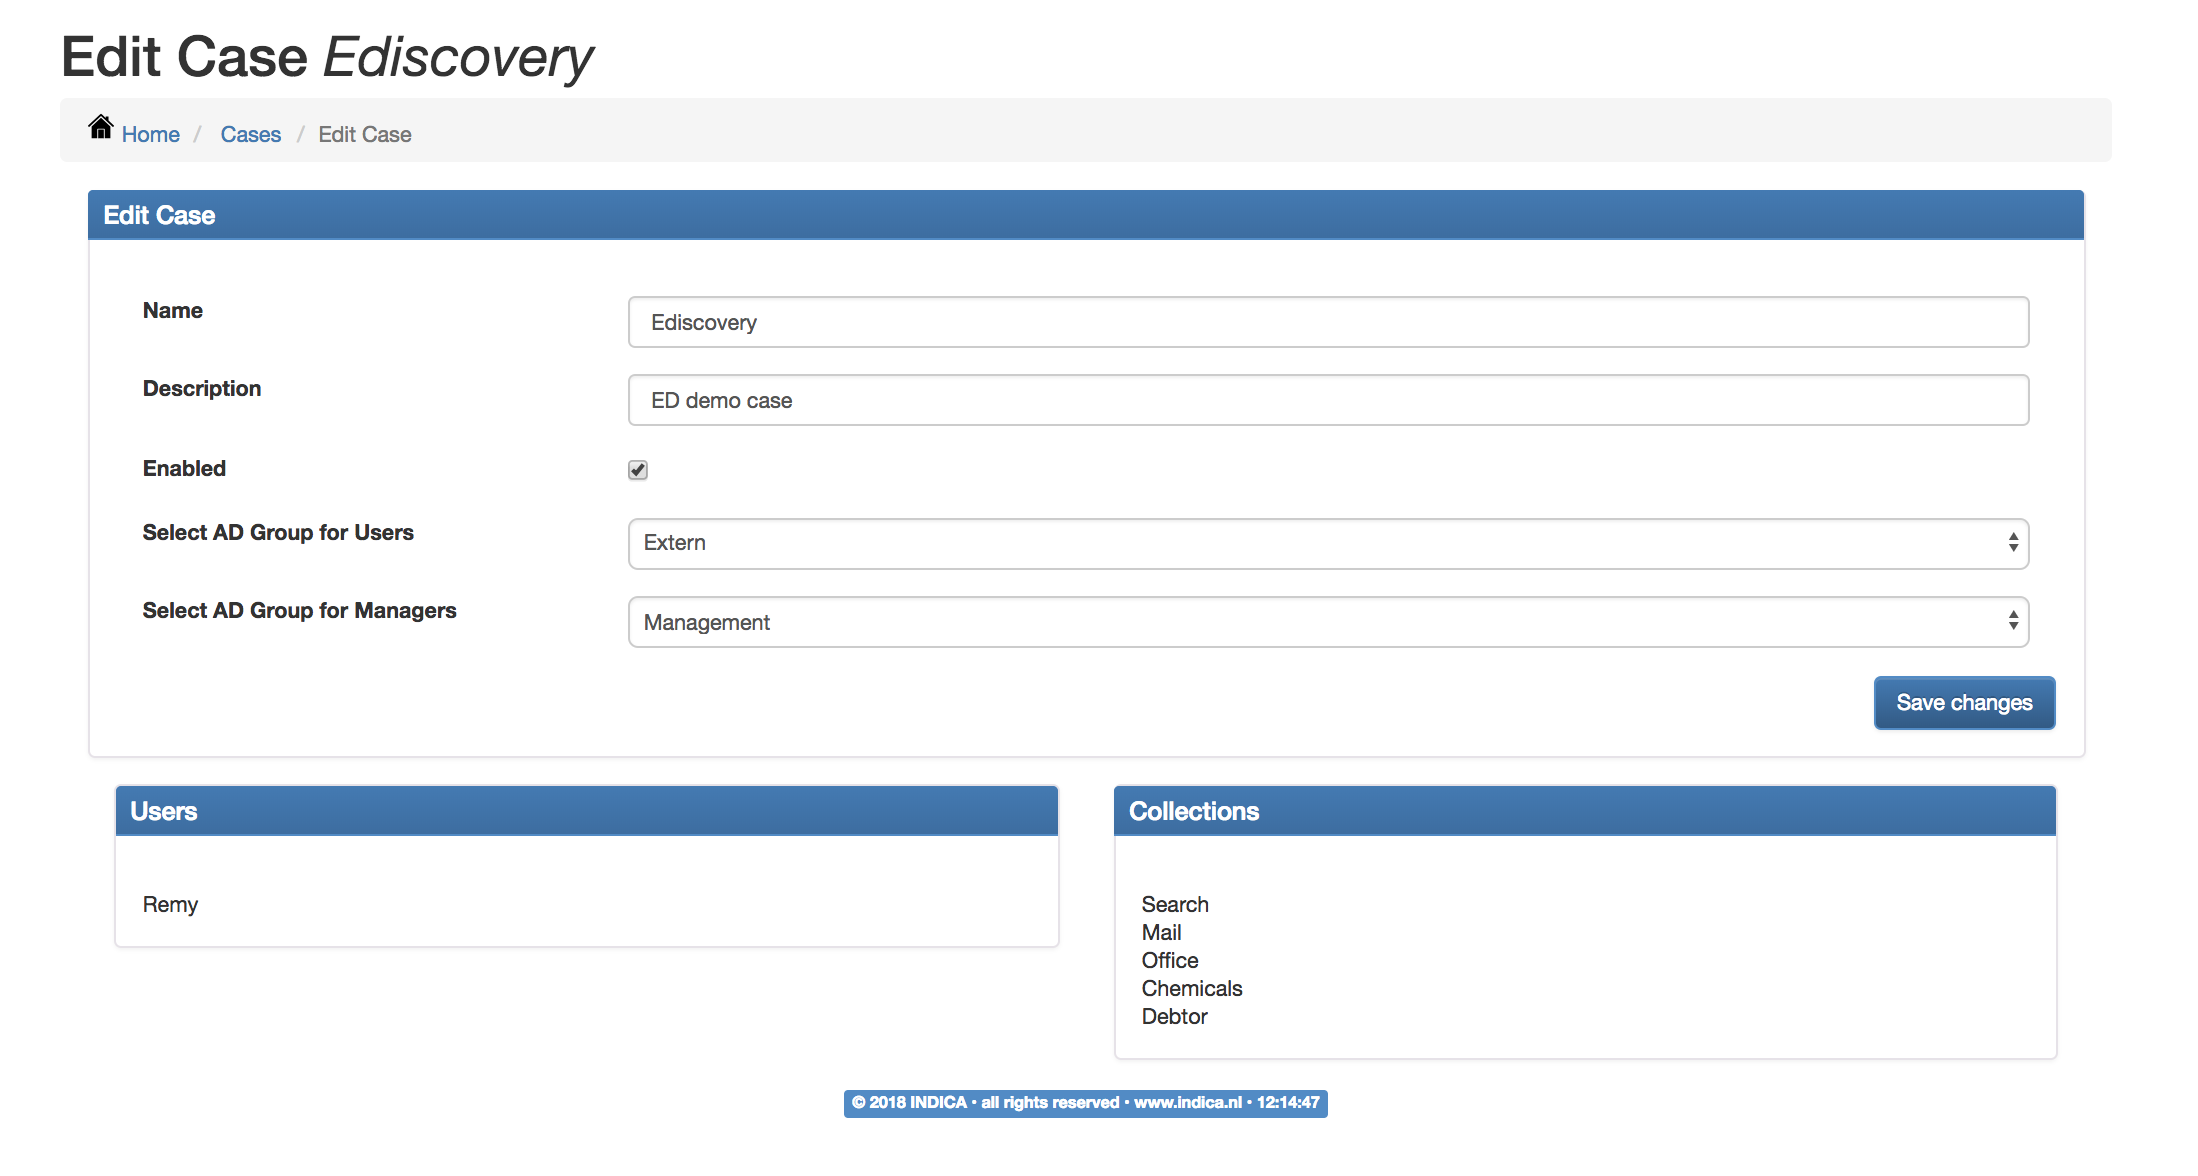
To edit information of an existing case, click on the ‘Edit’ button on the case and it will redirect you to the page below. Fill in/change the information on the page and click ‘Save Changes’ to complete the process. It also shows the user information in this case and the data collections in this case.
3. Delete case
To delete or archive an existing case, click on the ‘Delete’ or ‘Archive’ button on the case. The changes will be instantly reflected on the Cases page and all archived cases will be shown on the ‘Cases Archive list’.
Noted that deleted cases cannot be restored. Archived cases cannot be accessed by front-end users.

4. Restore case
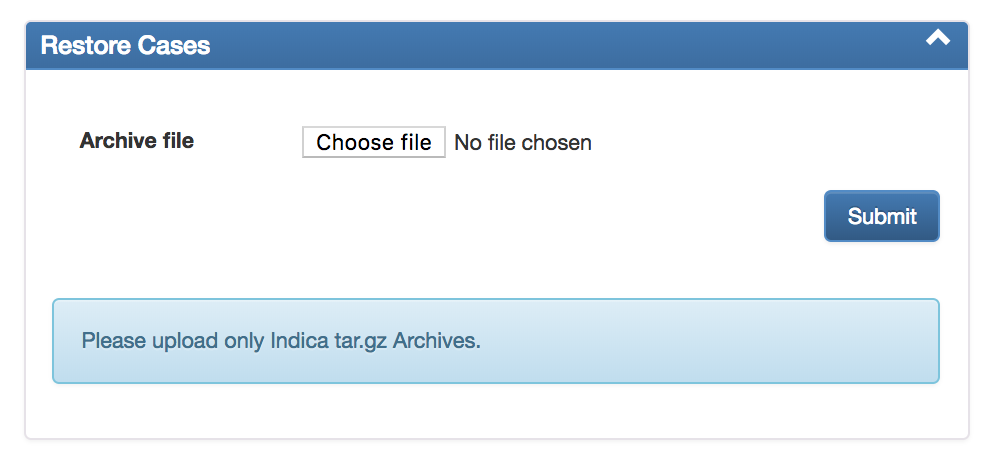
To restore an archived case, you can simply drag and drop the archived file in the section below and click ‘Submit’. You can also choose the file you want to restore by clicking ‘Choose file’. Note that you can only use INDICA tar.gz archives for this function and we advise you to restore to the same version of INDICA.
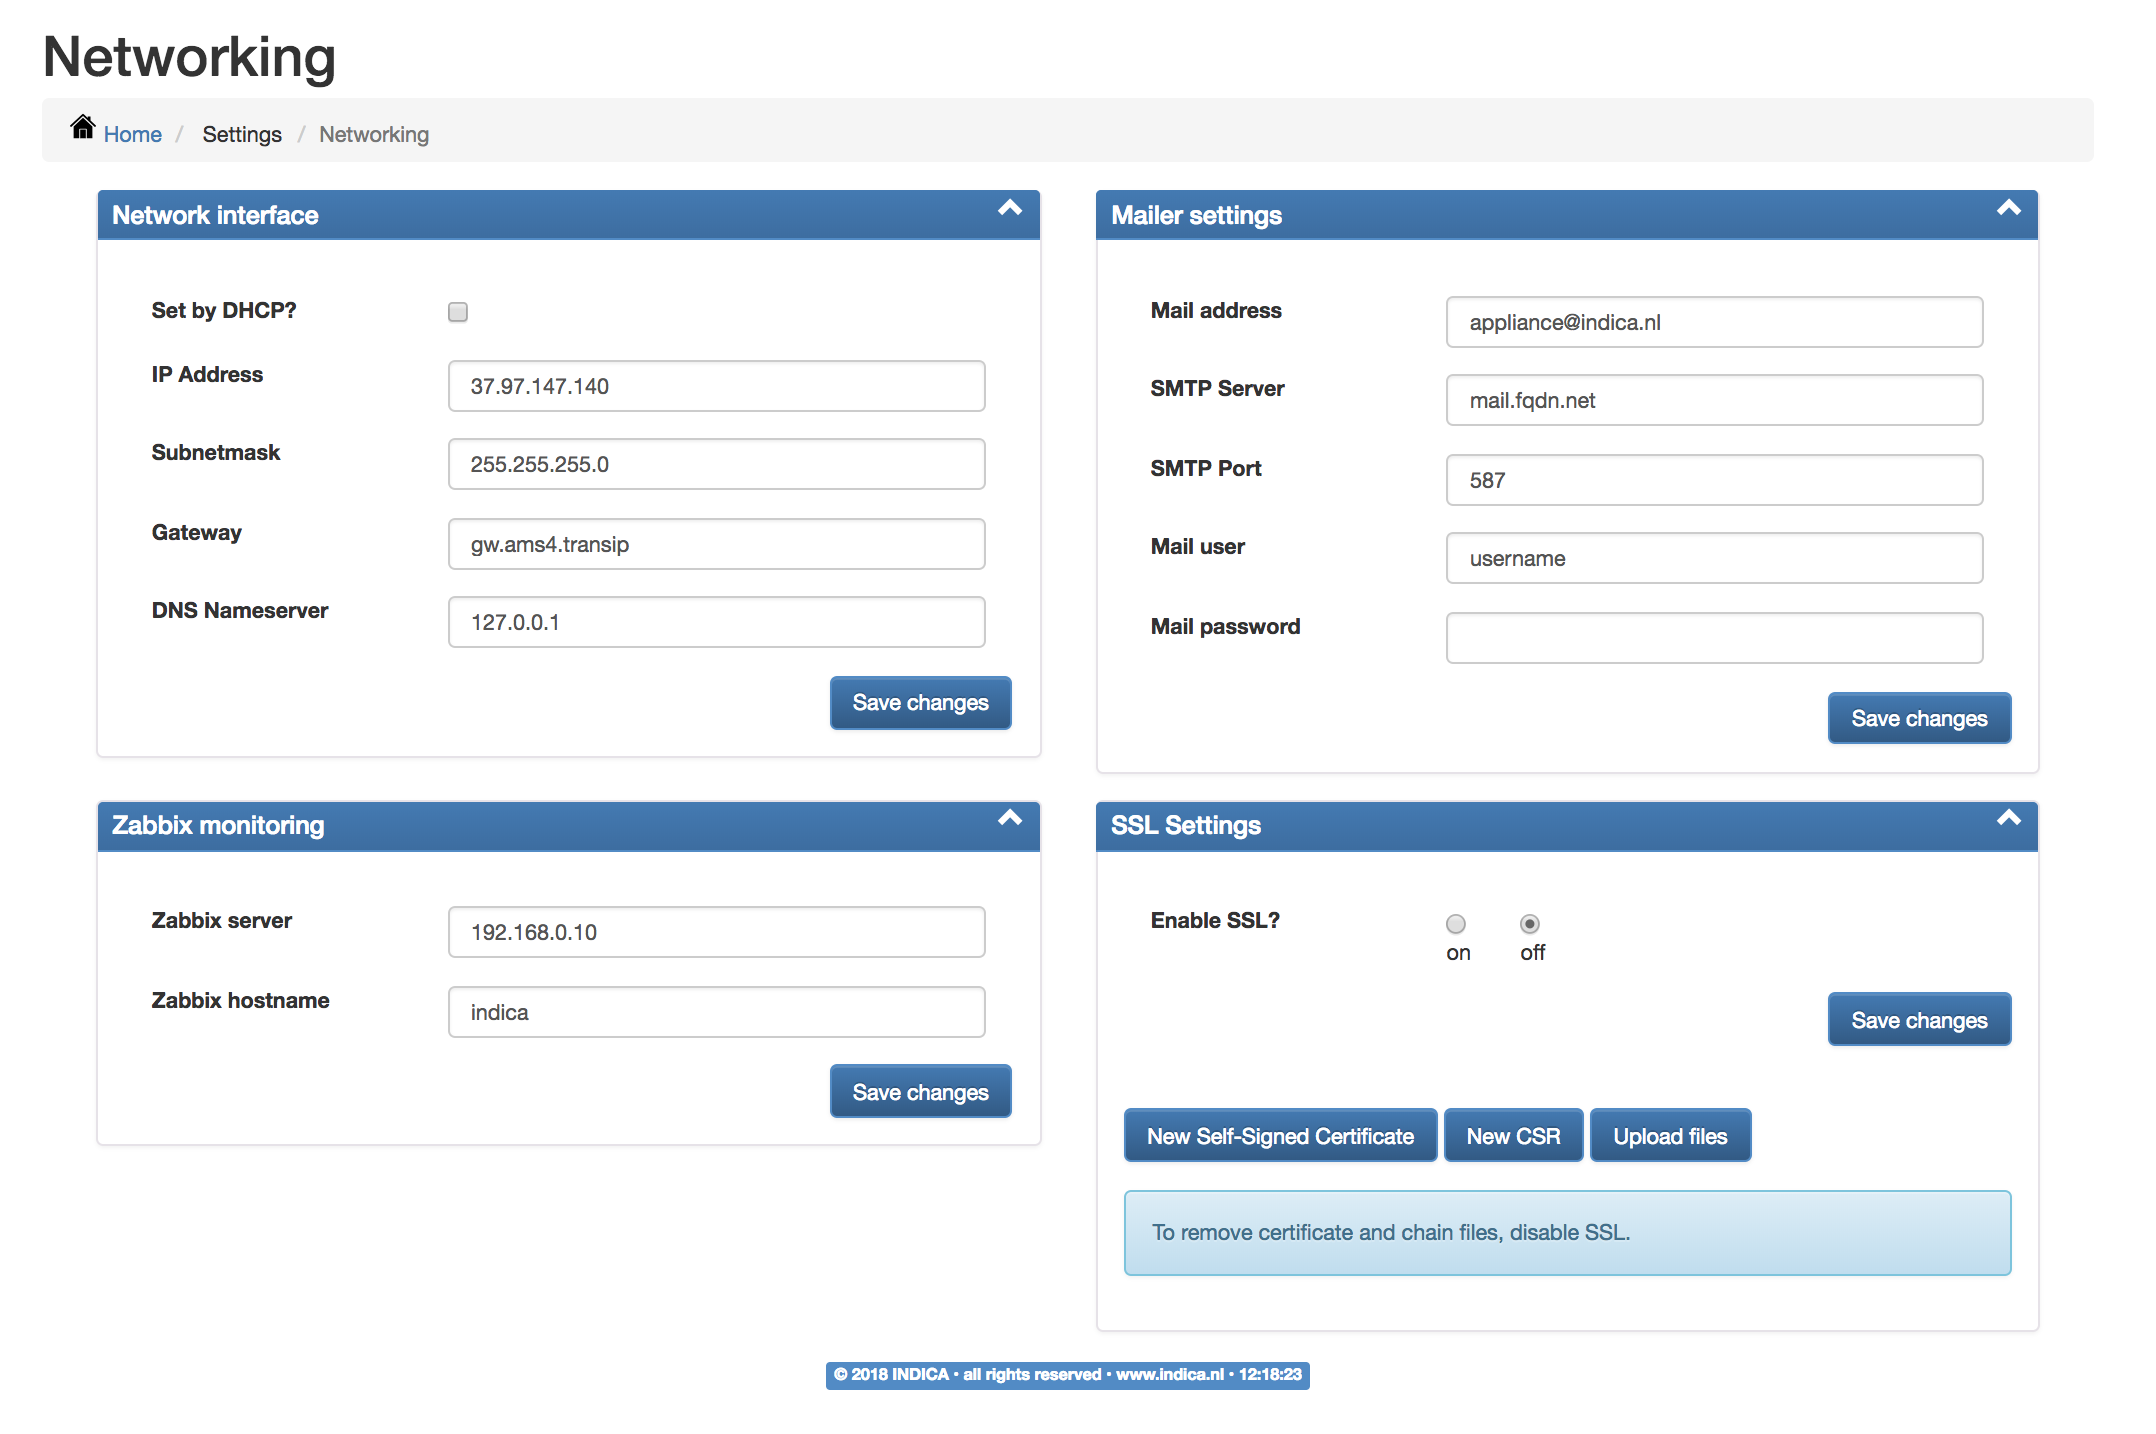
Networking
Networking settings are normally auto-configured during INDICA installation, we advise you to leave this page as default. In case you want to change the network settings, please refer to the content below.
1. Network interface
The network settings of the appliance can be changed here. In this section, you can choose either to configure the network manually or to have it set using DHCP. Change the setting and press ‘Save changes’.
2. Mailer settings
In this widget, the mailer can be configured so that the appliance has a way to send mails regarding updates, notifications and password resets.
3. Zabbix monitoring
Zabbix plugin settings can be set here. Enter your Zabbix instance IP address and the case-sensitive name of the appliance. Then, in your Zabbix instance, add a host with the same case-sensitive name for monitoring basic metrics of the appliance.
4. SSL settings
To force the appliance to use an SSL certificate for extra security, check the box and press ‘Save changes’. The appliance can be activated using a self-signed SSL certificate. The appliance can also generate a CSR and you can upload your own certificates if needed. Please contact your reseller to configure the appliance for a specific SSL certificate.
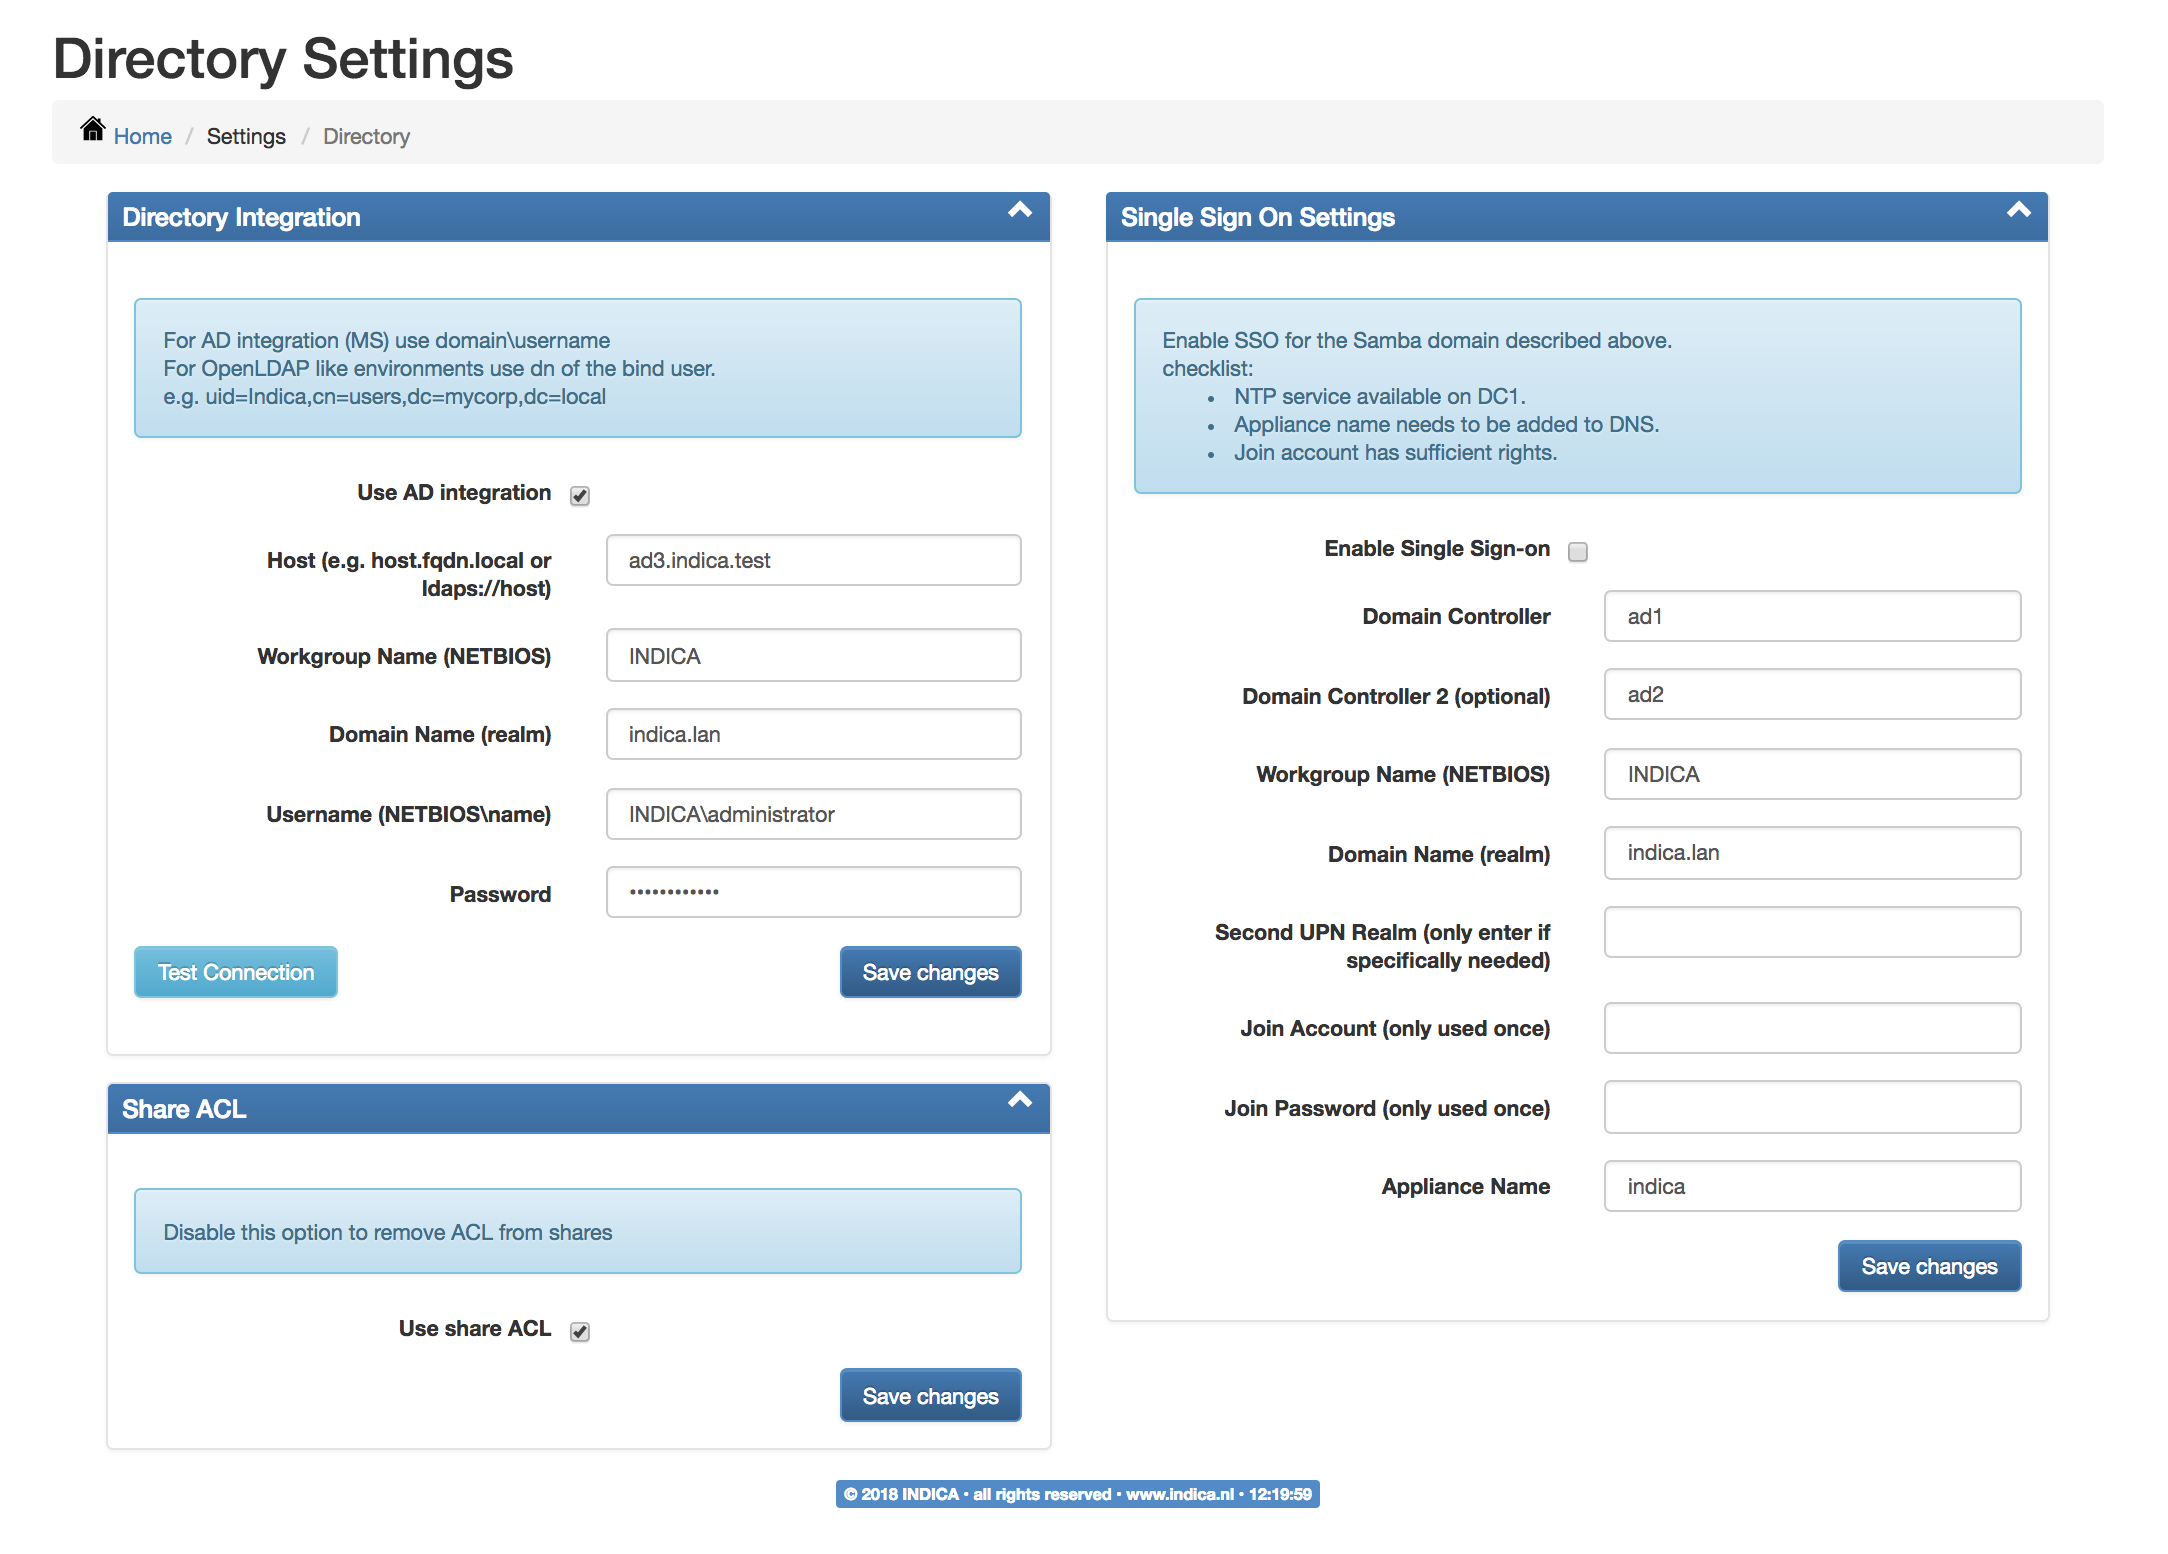
Open and Active Directory Settings
Active Directory settings can be edited in this page. If you are using Windows security groups, you can directly integrate your AD server here and click ‘Save changes’. Otherwise please go to ‘General settings’, turn on ’Use internal User DB’. By entering a Windows Domain Controller or LDAP server, the appliance can authenticate against the directory and use the user credentials for login and security. We advise you to have your AD settings information ready before installation.
If no directory connection is configured, everyone with access to the appliance will be able to access everything.
It will also use the directory connection for e-mail rights, e-mail addresses where possible and groups for the datatabs.
By checking the box and entering all the settings, real single sign-on can be achieved. The application will try to use the PC’s credentials to log on to the directory. If this is not possible, username and password need to be entered manually.
The appliance name must be added to the domain’s DNS system, otherwise this won’t work properly.
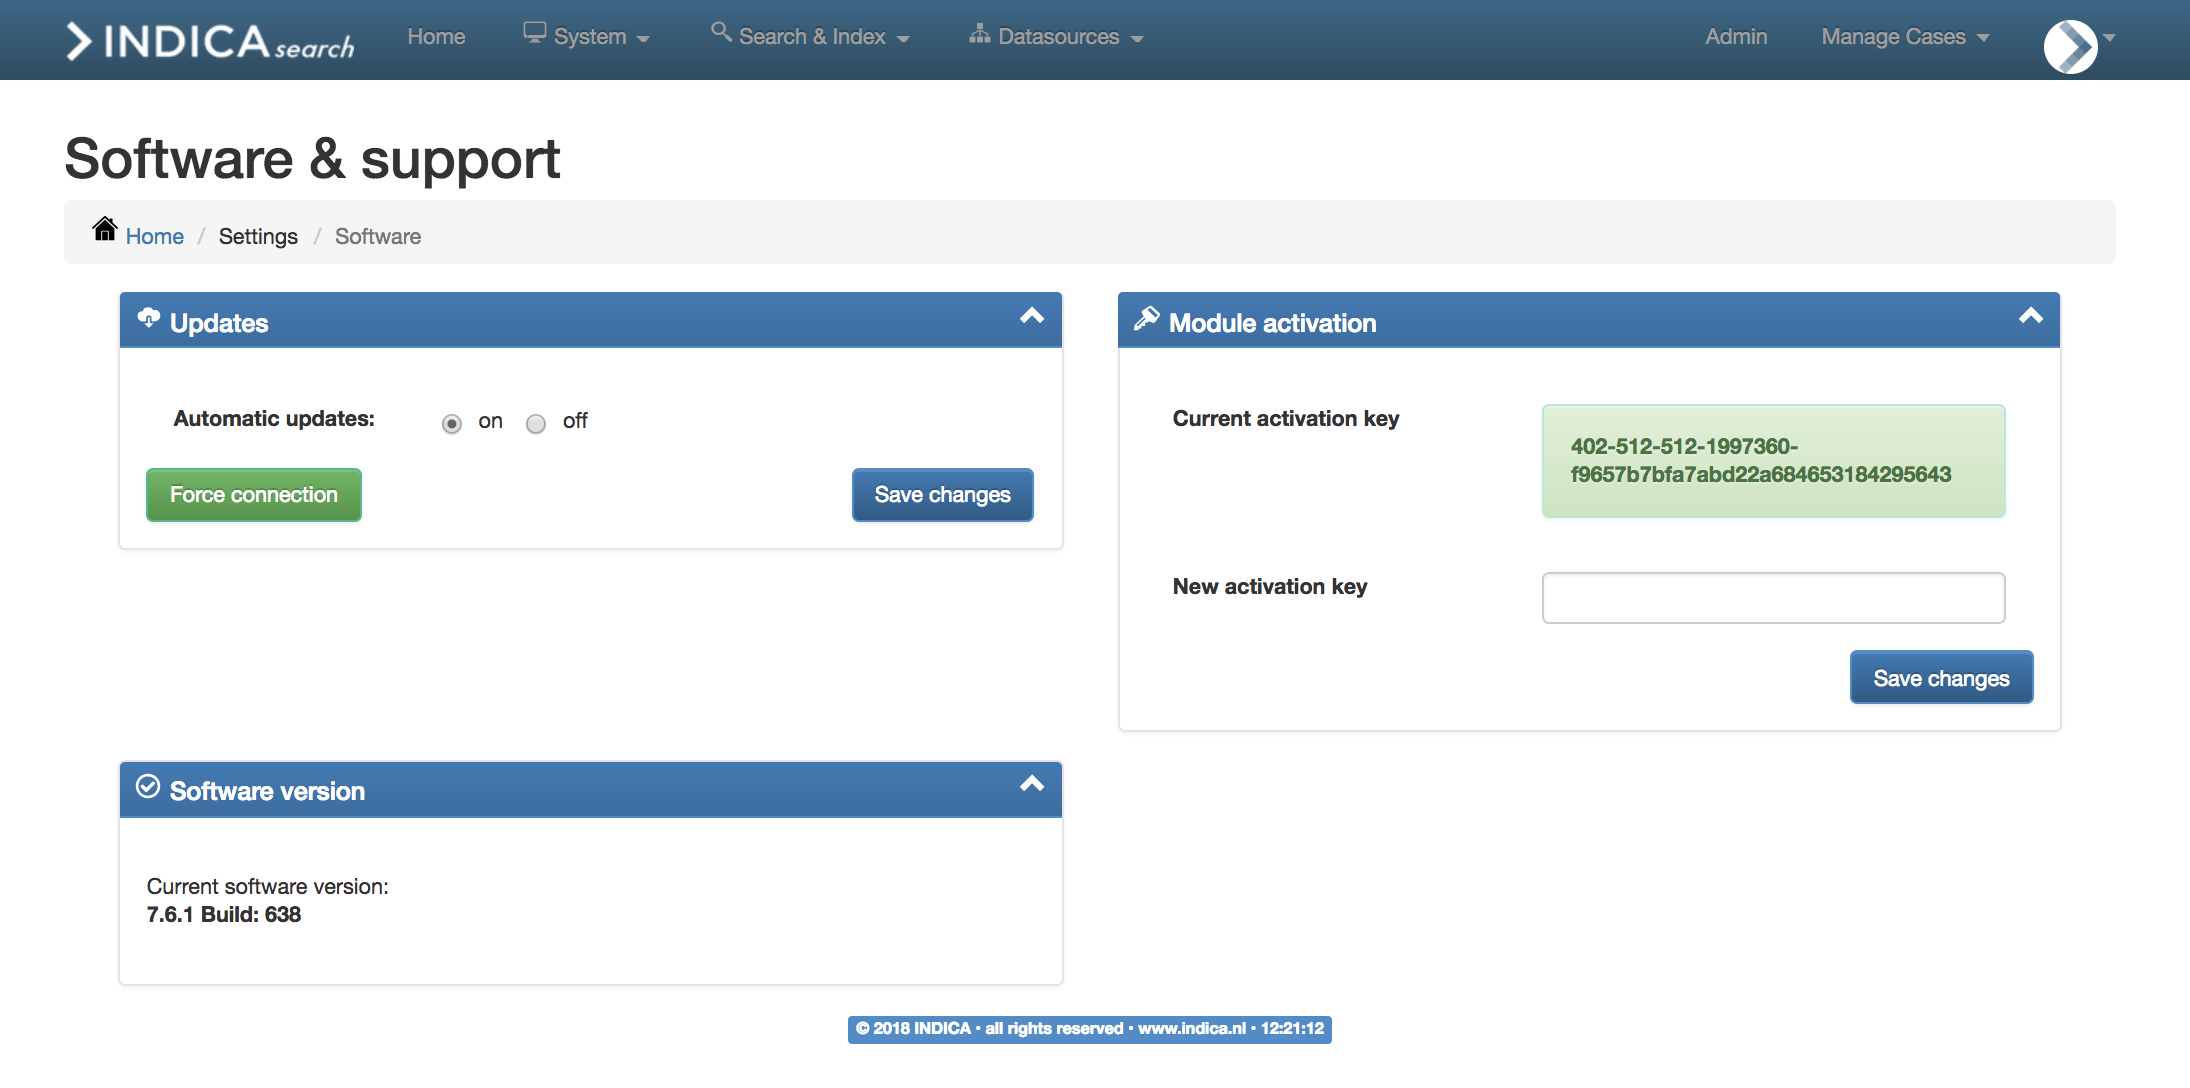
Software & Support
For general information about INDICA software please refer to this page. Here you can see the current software version that is running on your server, choose to have automatic software updates or not, and make changes on the activation key. Contact https://support.indica.nl/support/home to obtain a new activation key. By entering this key, new functionality can be unlocked.
Look & Feel
In this section, you can customize the INDICA interface to fit with your corporate style. You can change the logo on the top left side into your own company logo and switch the interface colour into your company colour. Make changes on the frontend language settings is also possible on this page, INDICA supports English, French, German and Dutch as front-end language.

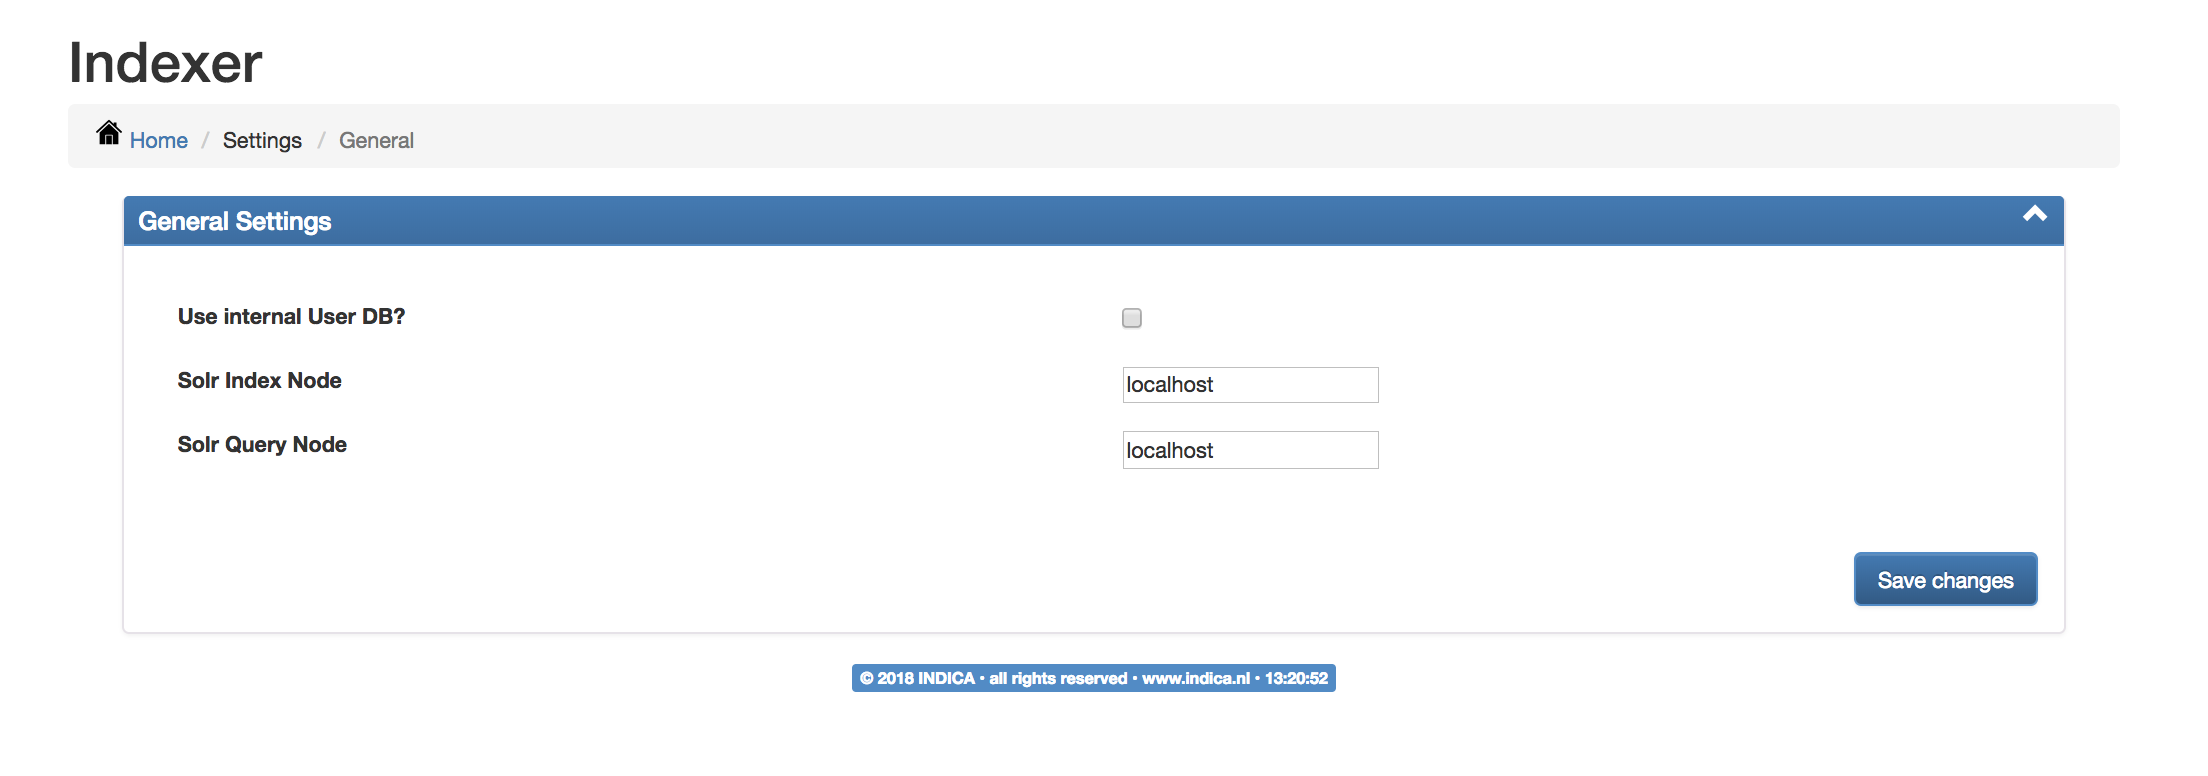
General Settings
If your company does not use Windows AD, please go to this page and enable use of the internal user database. This will allow the appliance to use its internal user database as main authentication source. When enabled, an external directory is not needed to allow authenticated users to use the appliance.
Indexing (backend) and query (frontend) can be set to run on the appliance itself (localhost) or have it be part of a distributed Cloud Environment. In case of Cloud setup, the (IP-)addresses of the respective nodes need to be entered here.
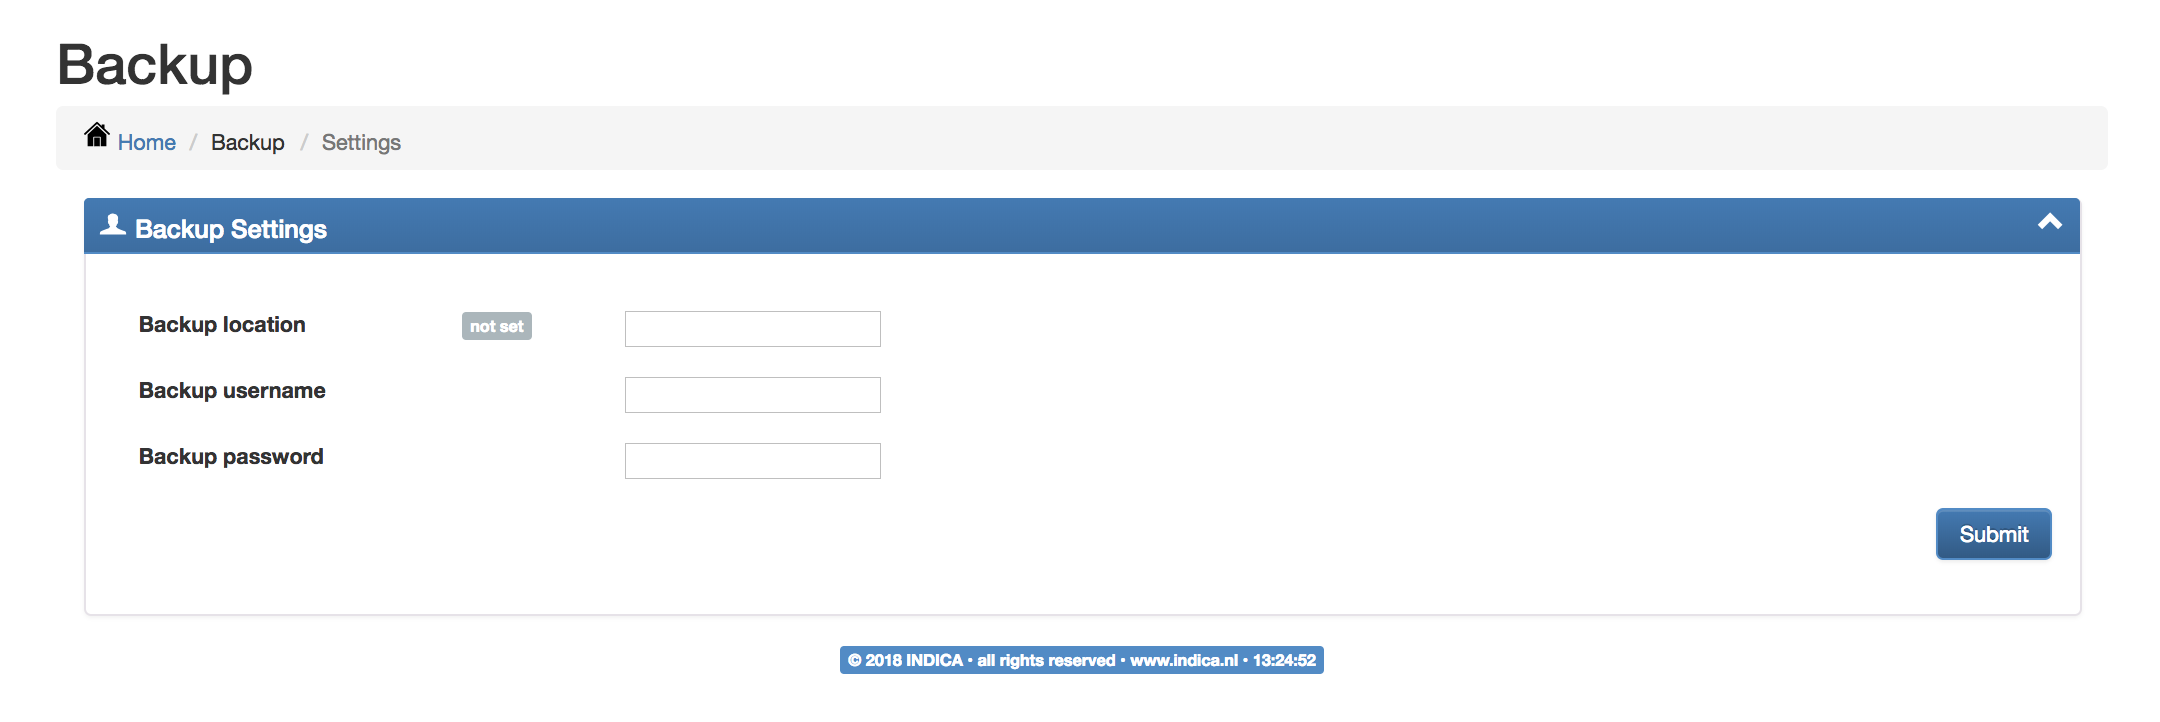
Backup Settings
On this page, you can set up a location to save the backups, you can also generate credentials to access the backup location.